Custom Addons and manage on CVE
This documentation provides the complete steps about how to use the custom addons in PAC. This documentation explains the steps to use custom addons in PAC. It describes the setup of Git repository, creation of PAC application from the PAC Wizard, creation and uploading of Git connector file, storing secrets in Key Vault, and updating the PAC configuration file. The documentation also provides the complete YAML configuration for PAC file and how to run the pentest.
Setup the Git Repository
We have to store the addon file(i.e. log4j-alpha.zap) and metadata yaml file in the Git repository at perticular location.
metadata.yaml
Metadata file contains the configurations which are require for load the addon in ZAP.
      Name: log4j
      Type: addon
      Engine: Java
      Description: Apache Log4j2 versions 2.0-beta7 through 2.17.0 (excluding security fix releases 2.3.2 and 2.12.4)
      Charset: UTF-8
      Dependency:
        Addons:
          - oast
          - network
Save both log4j-alpha.zap and metadata.yaml files at particular location in git. For example, we saved files inside the Log4Shell folder.
Git repository
.
|___ Log4Shell
│    │   log4j-alpha.zap
│    │   metadata.yaml
Create a PAC Application from the PAC Wizard
- Create a PAC application from the PAC Wizard screen, you will see the PAC config file like below.
Collection: Prancer_Collection
ConnectionName: prancer_connector
CloudType: azure
ApplicatioName: JuiceShopCustomAttack
RiskLevel: standard
Compliance:
- CIS
- CSA-CCM
ApplicationType: WebScan
Schedule: onetime
Target: https://prancersampleapp01.eastus2.cloudapp.azure.com:9000/
WebScan:
  AjaxSpider: false
Scanner:
  Cloud:
    Platform:
      Azure:
        ContainerInstance:
          AfterRun: delete
          NewContainerInstance:
            External:
              SubscriptionId: a6941677-4c37-42fb-960c-dad8f25060a3
              ResourceGp: farshid-test
              Region: eastus2
              ContainerGroupName: prancer-scanner-group
              ContainerName: prancer-pentest-instance
              ResourceName: prancer-instances-rsd-logshell
AuthenticationMethod: noAuthentication
# All the addons ID listed on link https://www.zaproxy.org/addons.
AddOns:
#  - accessControl
#  - ascanrulesAlpha
Create and upload a Git connector file
We need to create a connector file which will use to connect Git repository.
cve_connector.json
{
  "branchName": "openssl",
  "companyName": "prancer",
  "fileType": "structure",
  "gitProvider": "https://github.com/prancer-io/prancer-custom-attack.git",
  "httpsAccessToken": "secret-git-key",
  "private": true,
  "type": "filesystem"
}
name of the collection defined in git
| Field | Value | Description |
|---|---|---|
| branchName | branch name | The branch name inside the git repository. |
| companyName | company name | enter your company name |
| gitProvider | clone URL | The URL for clone the git repository. |
| branchName | branch name | Git branch name where the zap scripts are available |
| httpsAccessToken | secret key | Any secret key which will be used to store the git token in the key vault |
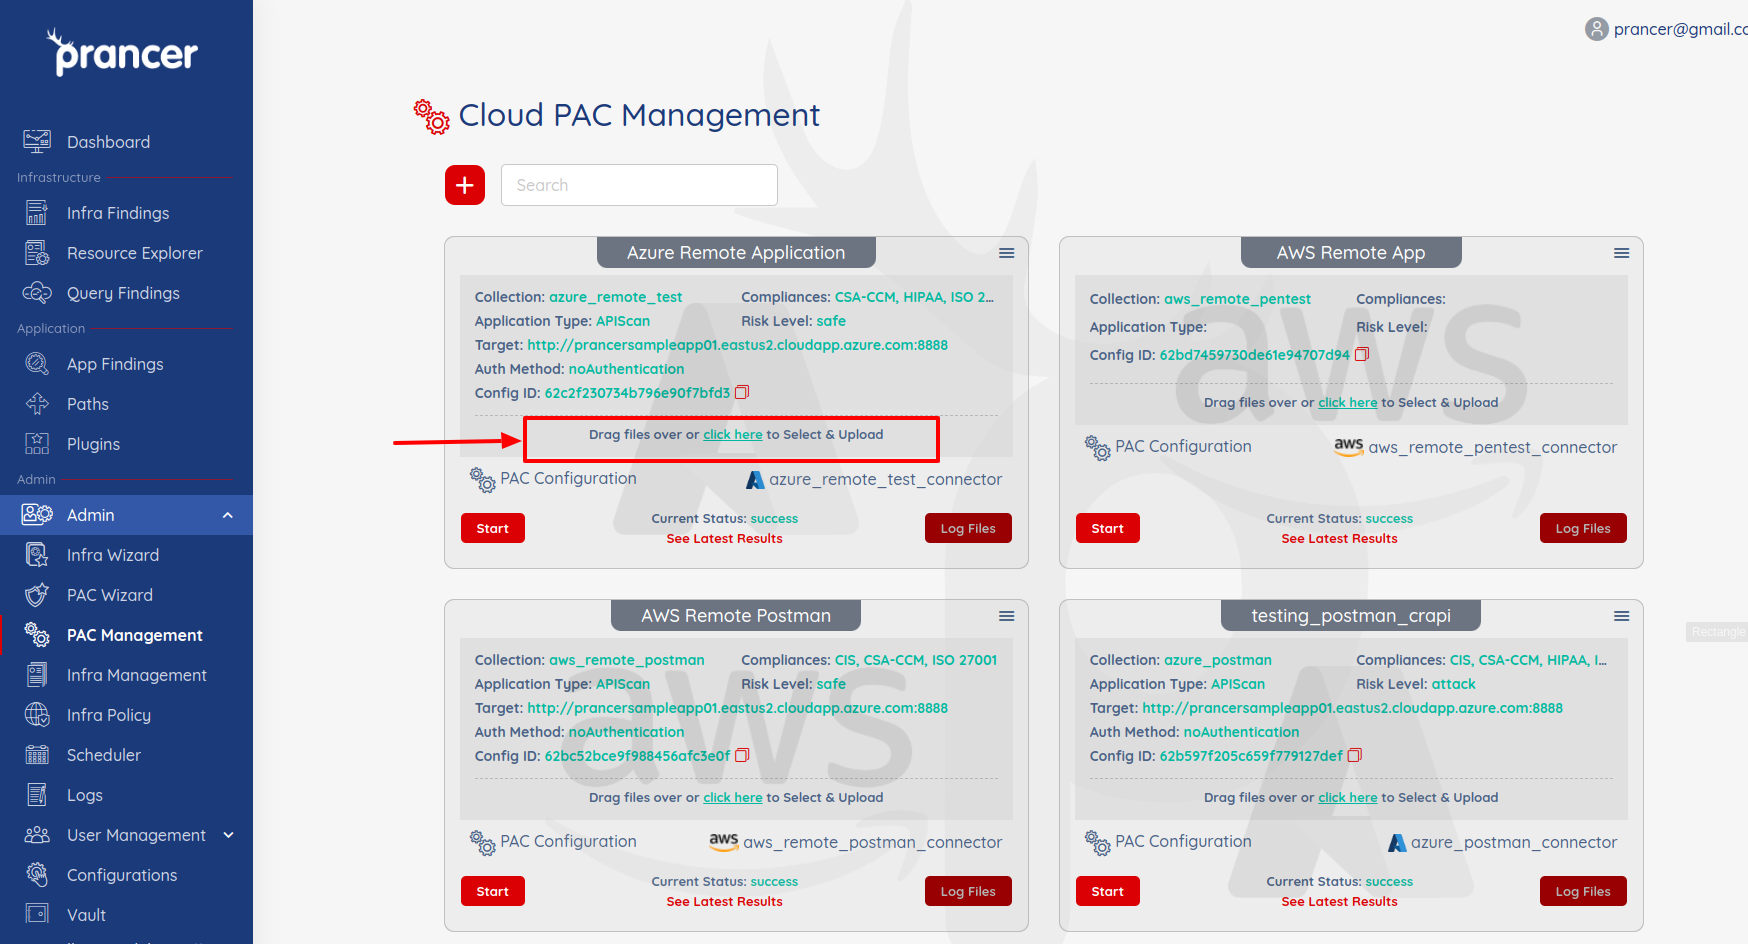
- Once the connector file is created then Drag and drop the file over a collection.
Store the secrets in Key Vault
We require to store the authentication token to connect and clone the Git repository. Generate the git access token from the Git console. Here is the documentation for create the personal access token on Github.
- Give the following permissions while generating the access token.
repo: Full control of private repositories
read: user Read ALL user profile data
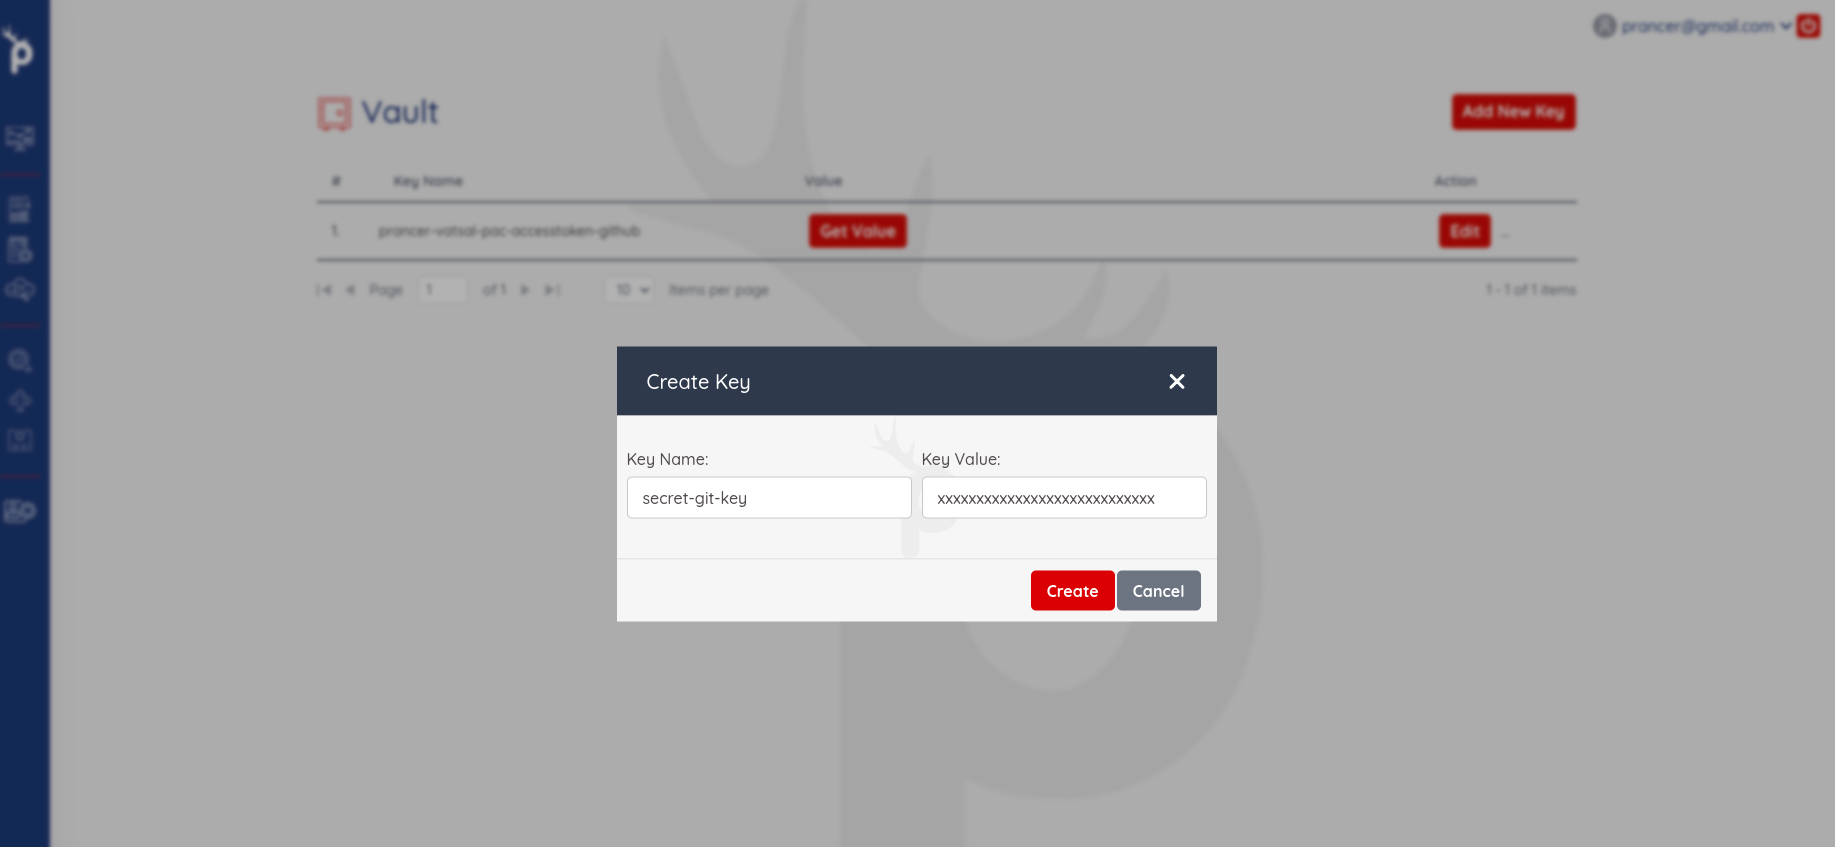
Create the new entry in Key Vault, where Key Name is the value of httpsAccessToken and Key Value is generated access token.
Update the PAC Config file:
- Open the PAC Management screen and click on PAC Configuration for which you want to add the script.
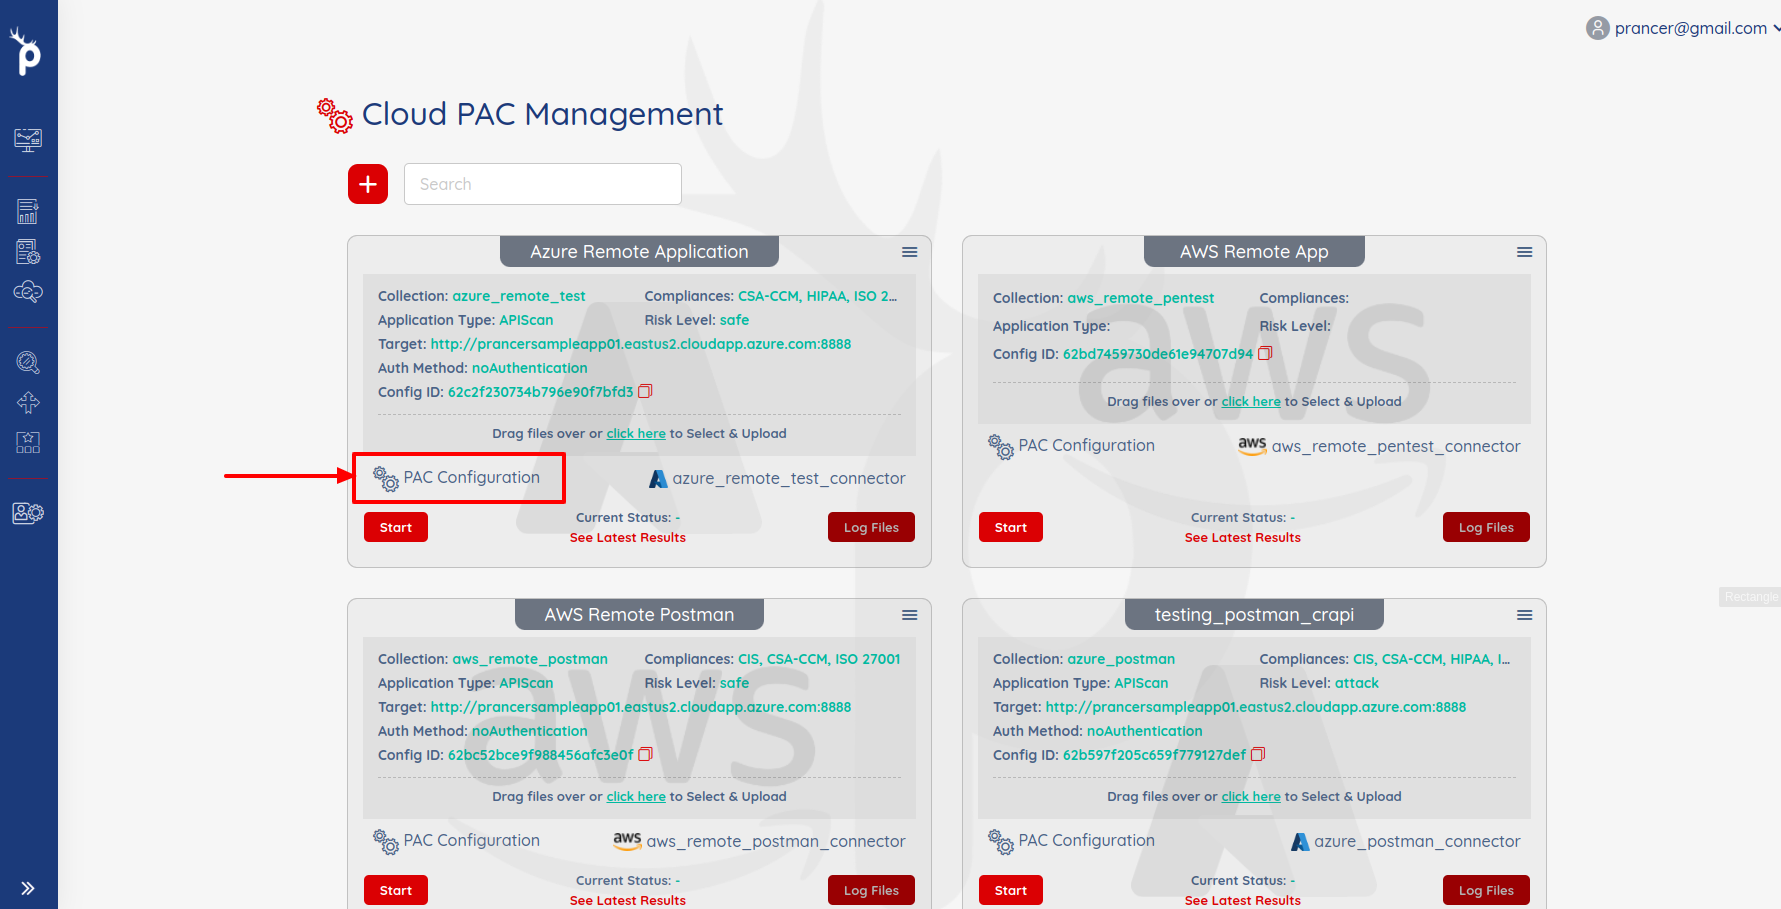
Add the CVE field in the PAC configuration file.
CVE:
- Path:
    Include:
    - log4shell
    - opensslCertificate
    Exclude: []
  Connector: cve_connector
  Metadata: ""
  Parameters: {}
  Secrets: {}
| Field | Value | Description |
|---|---|---|
| Connector | connector name | the container name which you specified in Git connector. |
| Path | Include and Exclude paths | Contains list of include and exclude paths |
| Path.Include | list of path | Contains list of script paths ( Regex ) which need to include in processing |
| Path.Exclude | list of path | Contains list of paths ( Regex ) which will be excluded while load the scripts. |
Complete PAC File
Collection: Prancer_Collection
ConnectionName: prancer_connector
CloudType: azure
ApplicatioName: JuiceShopCustomAttack
RiskLevel: standard
Compliance:
- CIS
- CSA-CCM
ApplicationType: WebScan
Schedule: onetime
Target: https://prancersampleapp01.eastus2.cloudapp.azure.com:9000/
WebScan:
  AjaxSpider: false
CVE:
- Path:
    Include:
    - log4shell
    Exclude: []
  Connector: cve_connector
  Metadata: ""
  Parameters: {}
  Secrets: {}
Scanner:
  Cloud:
    Platform:
      Azure:
        ContainerInstance:
          AfterRun: delete
          NewContainerInstance:
            External:
              SubscriptionId: a6941677-4c37-42fb-960c-dad8f25060a3
              ResourceGp: farshid-test
              Region: eastus2
              ContainerGroupName: prancer-scanner-group
              ContainerName: prancer-pentest-instance
              ResourceName: prancer-instances-rsd-logshell
AuthenticationMethod: noAuthentication
Run the Pentest:
- Click on
startbutton to run the pentest.
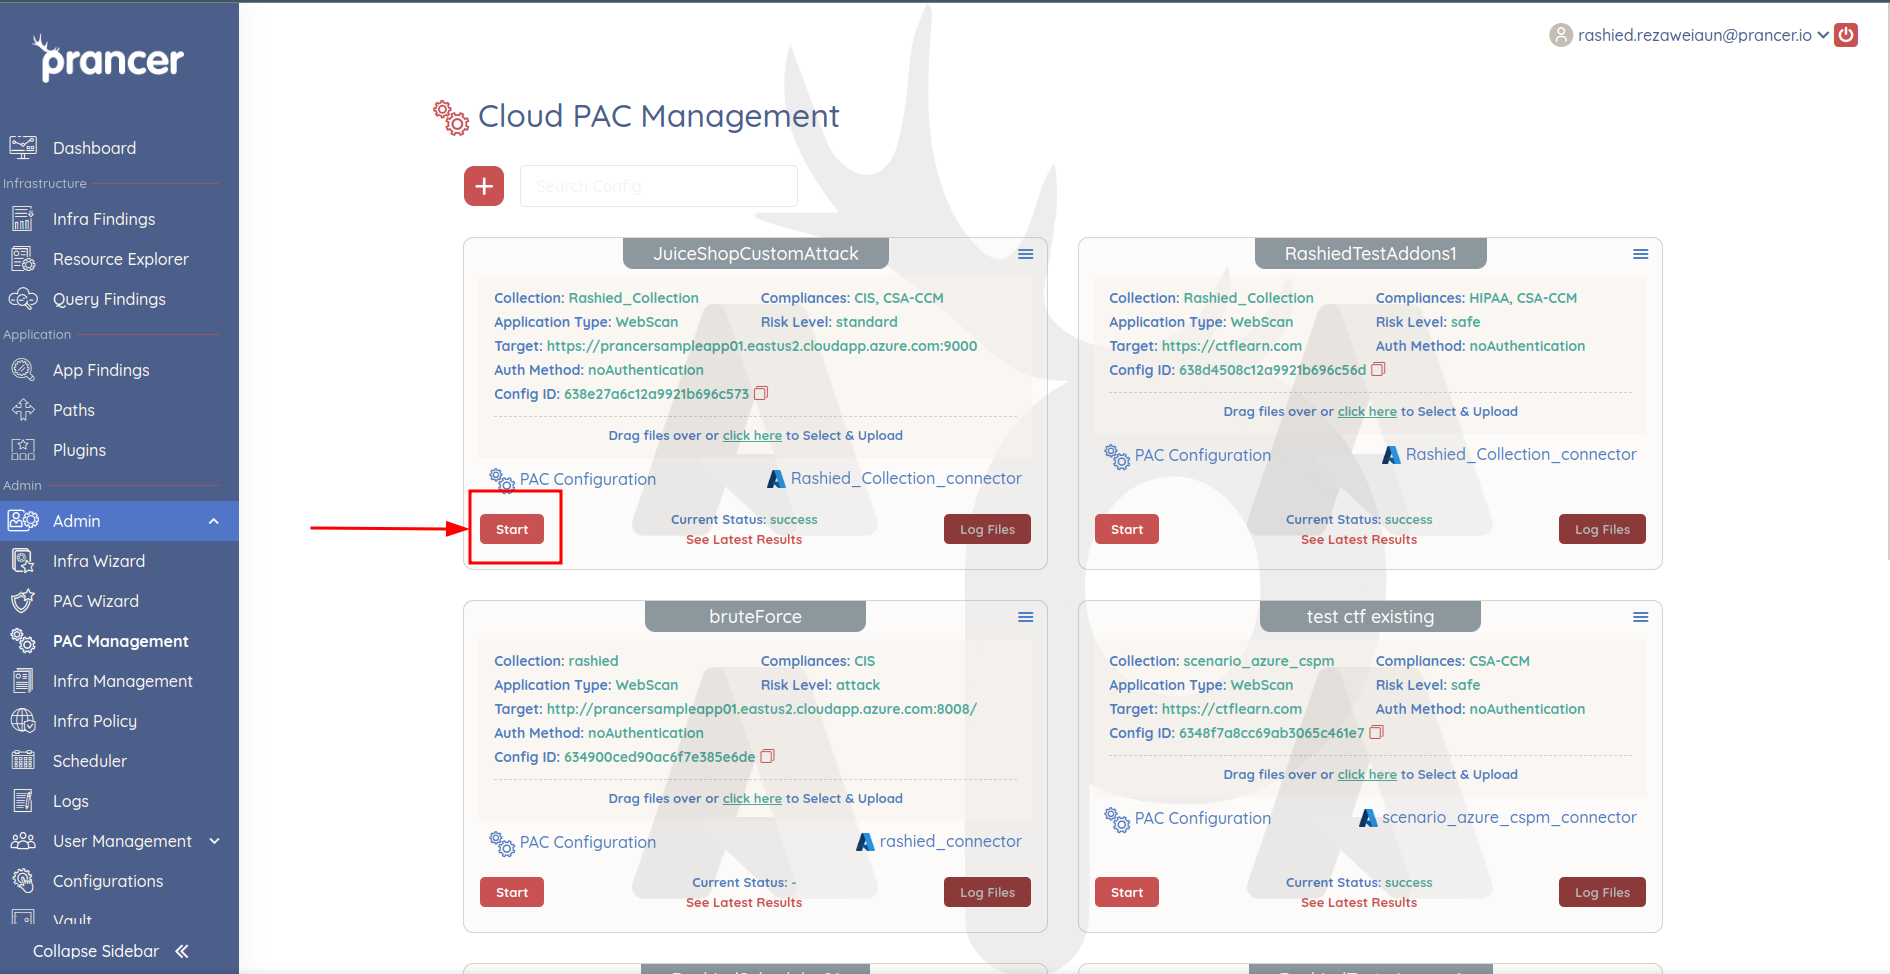
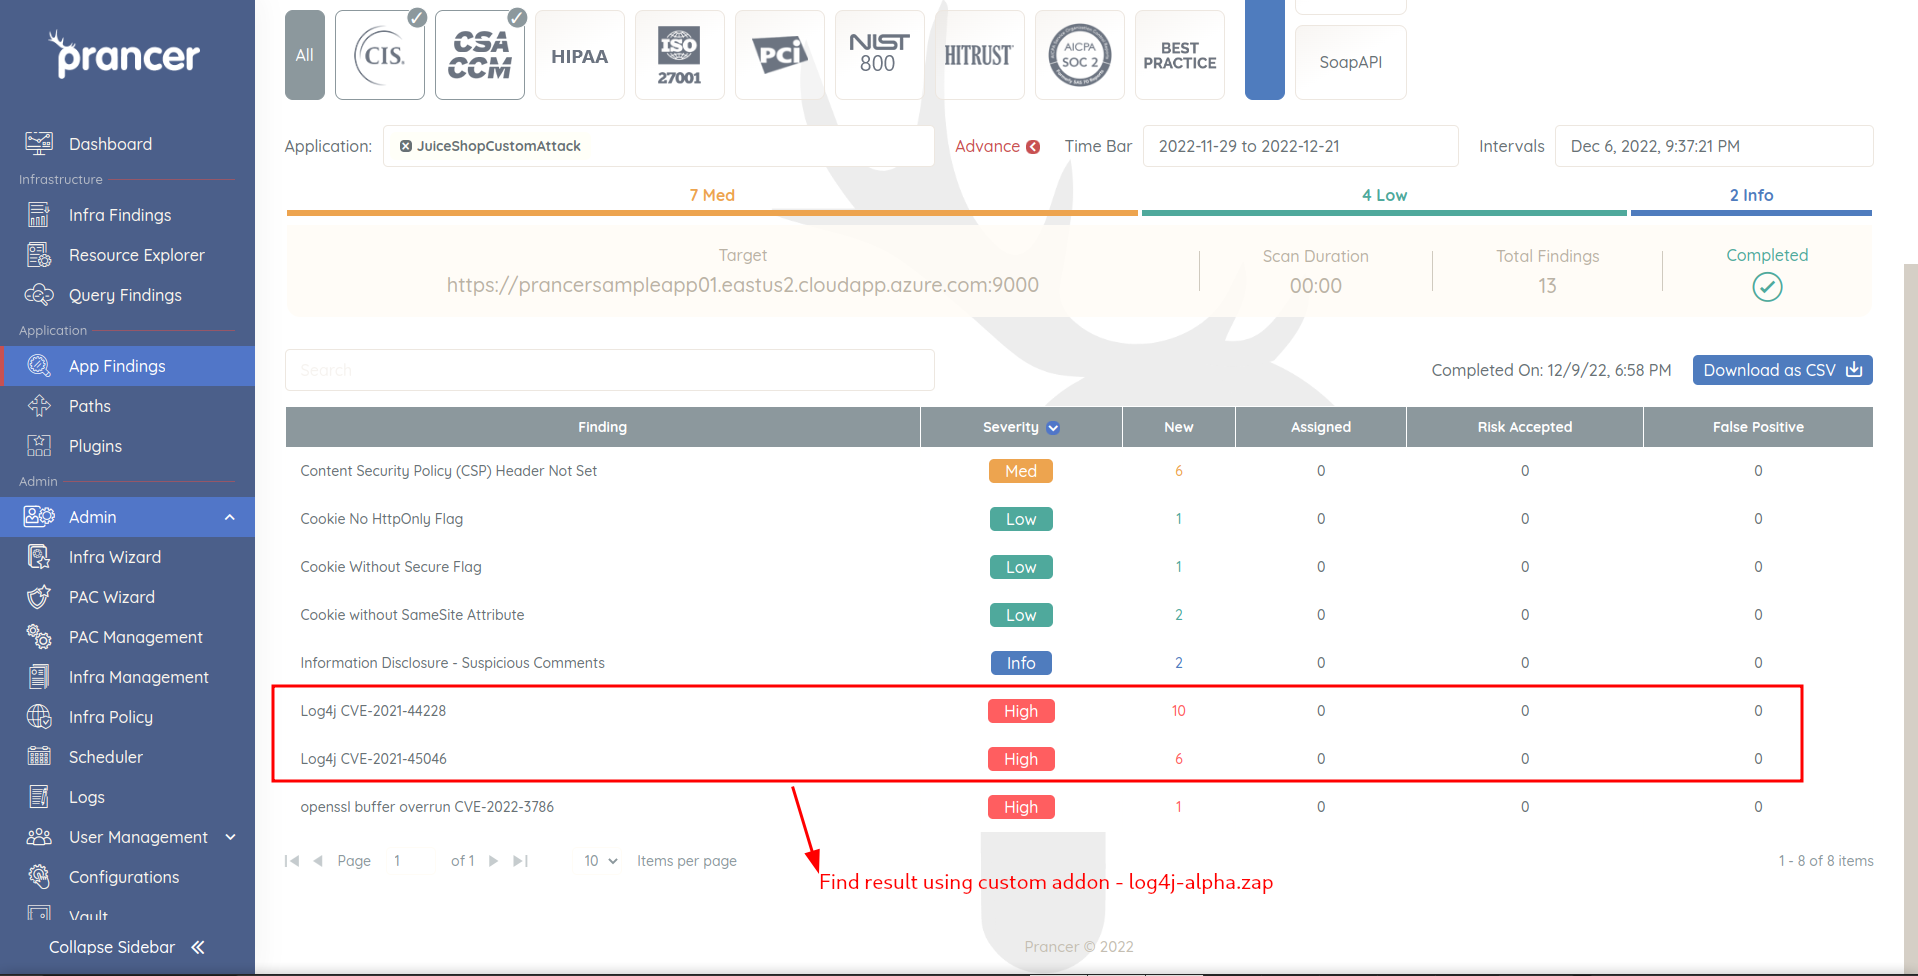
- After sometimes when the Pentest will complete then you can see the results by click on
See Latest Resultslink.

- It will open the
Application Security Findingspage.