PAC Configuration Wizard in Custom format
Introduction
The PAC Configuration Wizard in Custom format allows you to run Prancer PAC infrastructure on your local machine, in a CI/CD pipeline, or other clouds not listed in the selection box. To use it, select the "custom" option and follow the step-by-step instructions mentioned on this page. You will enter application details, select the scanner and target, configure authentication details, and generate a manifest file. Once you have reviewed the details and submitted the job, you can use the Prancer PAC CLI to integrate the custom PAC config into your CI/CD pipeline. The wizard provides various options for risk level and compliance, making it a flexible and customizable solution for pentesting.
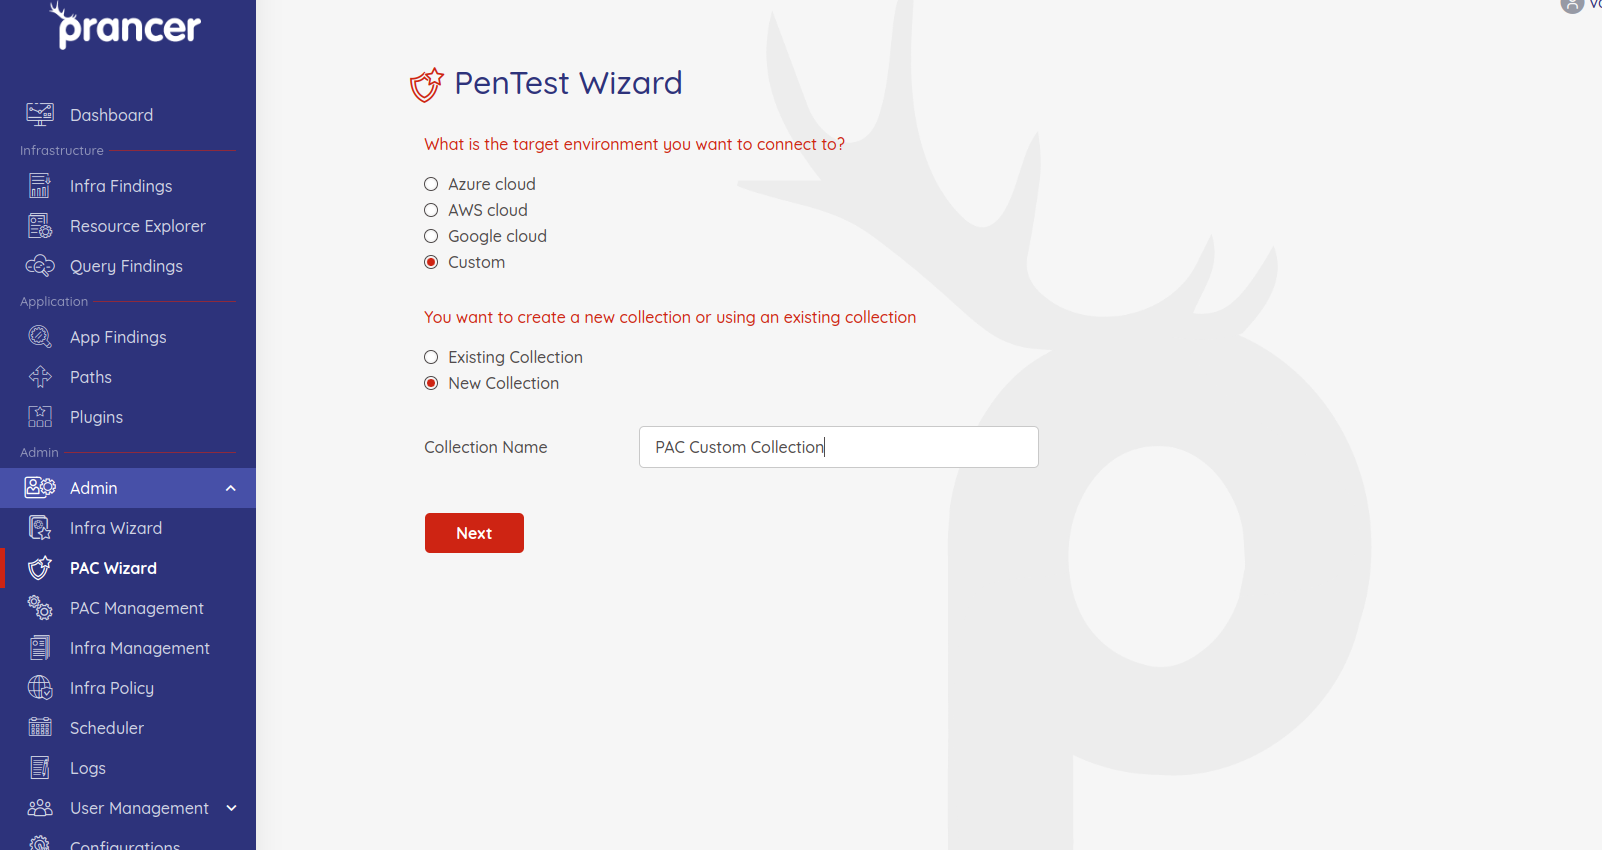
Step 1 - Select Target Environment
- Select the
Customoption as target envirnment and enter the collection name.
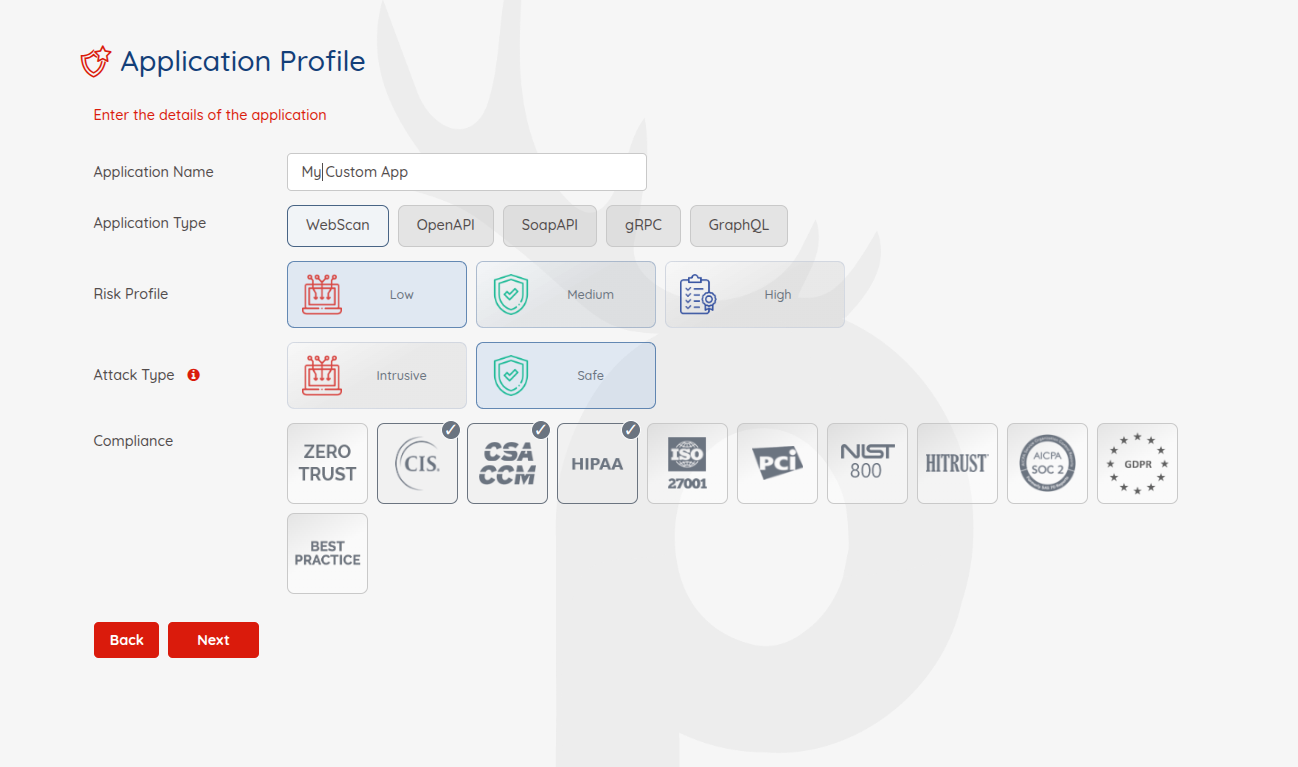
Step 2 - Enter Application Details
On this page, we will fill out the basic information regarding the application you want to do the pentesting.
-
Application Name:give your application a name for future references -
Application Type:PAC supports Web, Open API, and Soap API applications for scanning -
Risk Level:There are three risk levels available for pentesting:-
Safe: running pentesting rules which are safe for production instances.
-
Attack: When you run the pentesting in an attack mode, it will insert data into your forms. This is the best choice when you are pentesting on lower environments and have existing crawls.
-
Standard: doing safe and attack pentesting together. It is recommended for all lower environments.
-
-
Compliance:Which compliance do you have to follow. You can filter your applications based on the selected compliance later.
Step 3 - Scanner and Target Selection
- Enter the IP address of your scanner instance and the target URL on which you want to do Pentest.

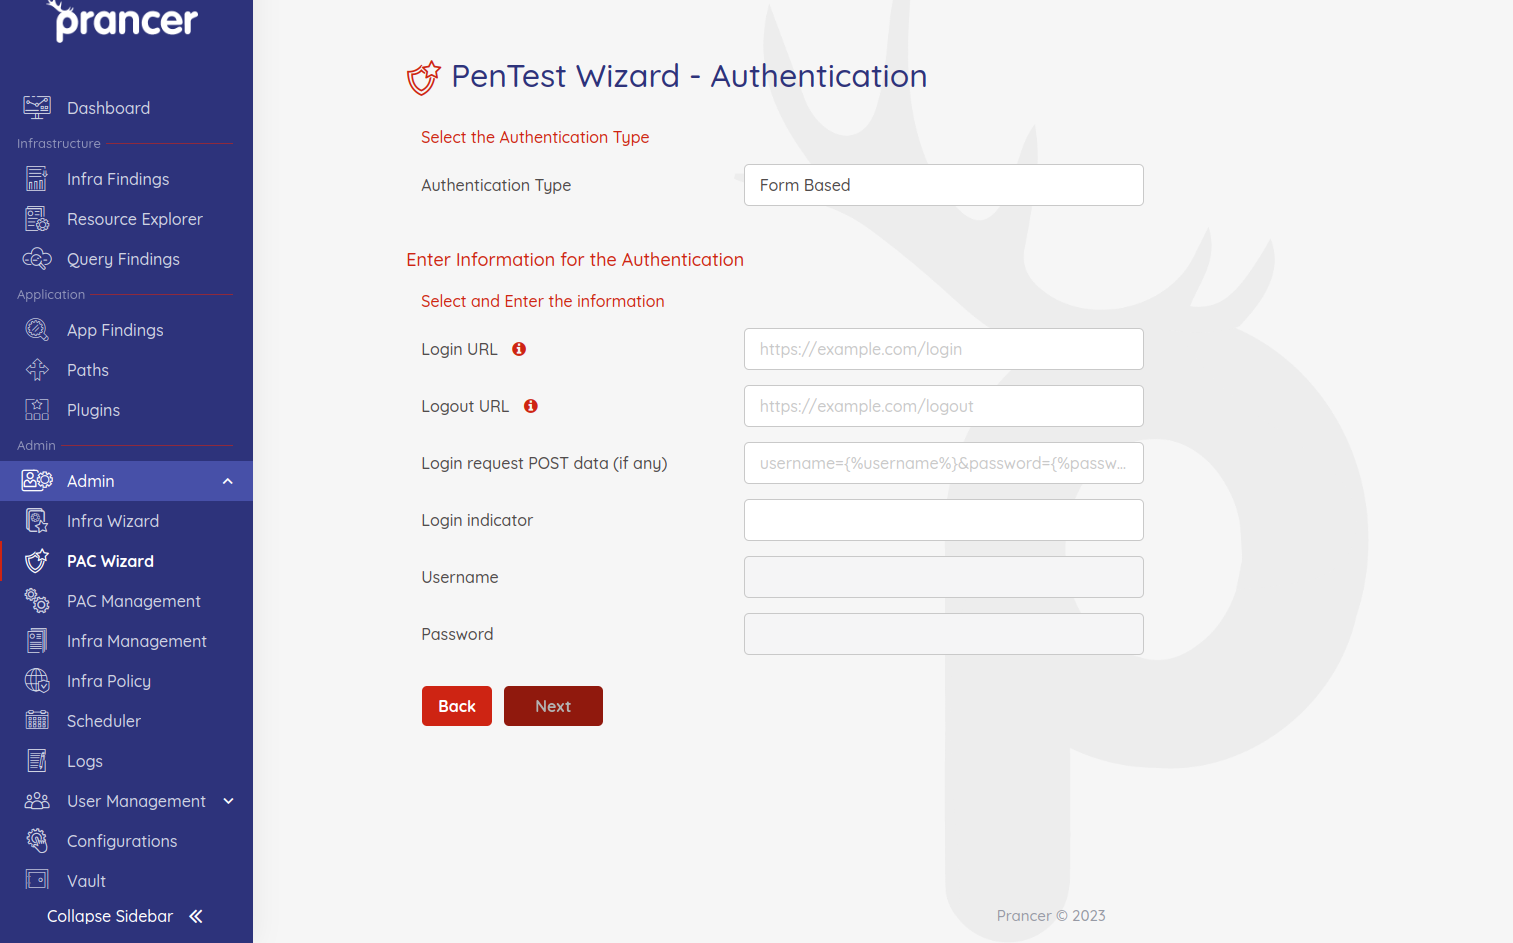
Step 4 - Authentication Details
On this page, you can configure the authentication information of your application.
Prancer PAC supports various authentication mechanisms. PAC requires different information to be entered on this page for each authentication type.
Step 5 - PAC file
In the last step of the pentesting wizard, PAC generates a manifest file based on the YAML format showing all the details you have entered in previous steps with more details. You can change the items here if you need.
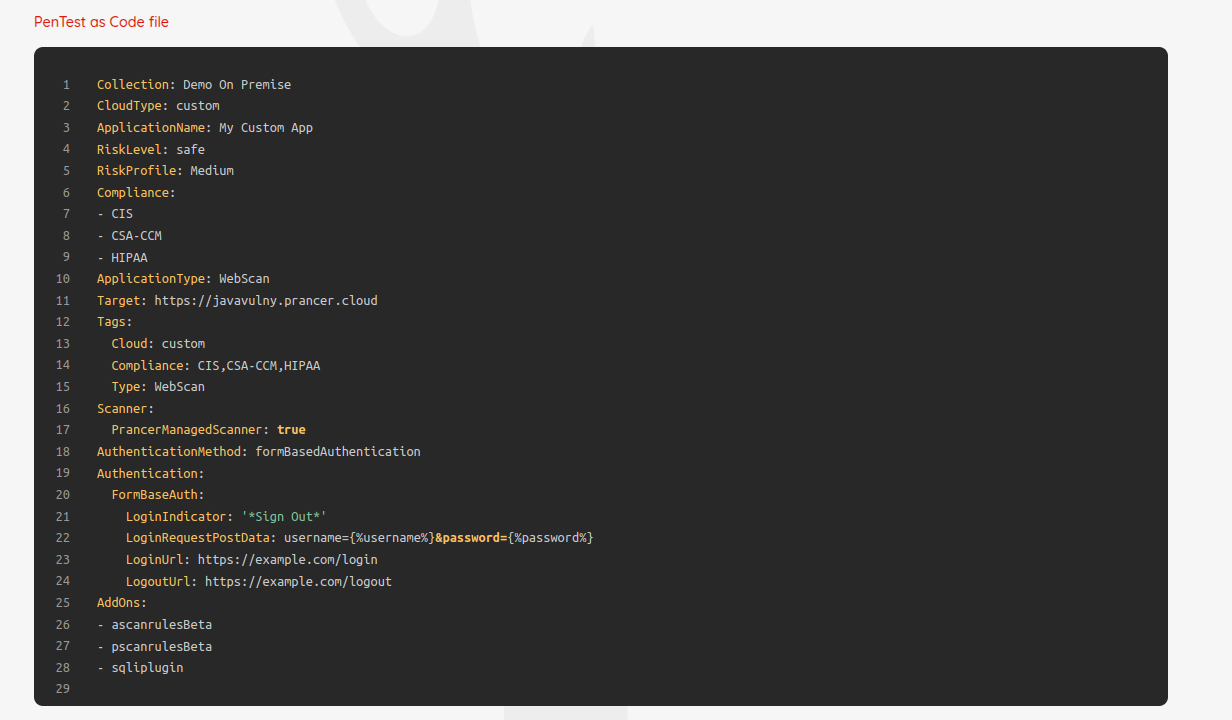
Review all the items and if everything is fine, click on "Submit" to submit a new pentesting job to Prancer. After submit the custom wizard, follow the Prancer PAC CLI steps to know more about how to use custom PAC config in CI/CD pipeline.