Prancer Github App
The Prancer Github application provides an easy way to verify Infrastructure as Code (IaC) templates. To configure the app in a Github repository, the user needs to follow a few steps. First, they need to install the Prancer Github application in the organization repository by going to the Prancer Github application link and clicking on the "Install" button. Then, they can create a collection from the Configuration Wizard page by entering the collection name, selecting the 'IAC' option, and authenticating to the Github server. After creating the collection, the user can enable the Github autofix feature for that collection by adding the 'autofix_pr' configuration with a value of 'true'. Once enabled, the Github app will validate new and changed files in pull requests, autofix the issues, and create new pull requests with the fixed code. The user can test the Github app integration by creating a pull request with the specified branch as the destination branch and checking for the Github app comment about the autofixes.
Prancer Github application provides the easy way to verify your IaC templates. Here are the steps using which you can configure your Github app in your github repository and test it from prancer UI portal.
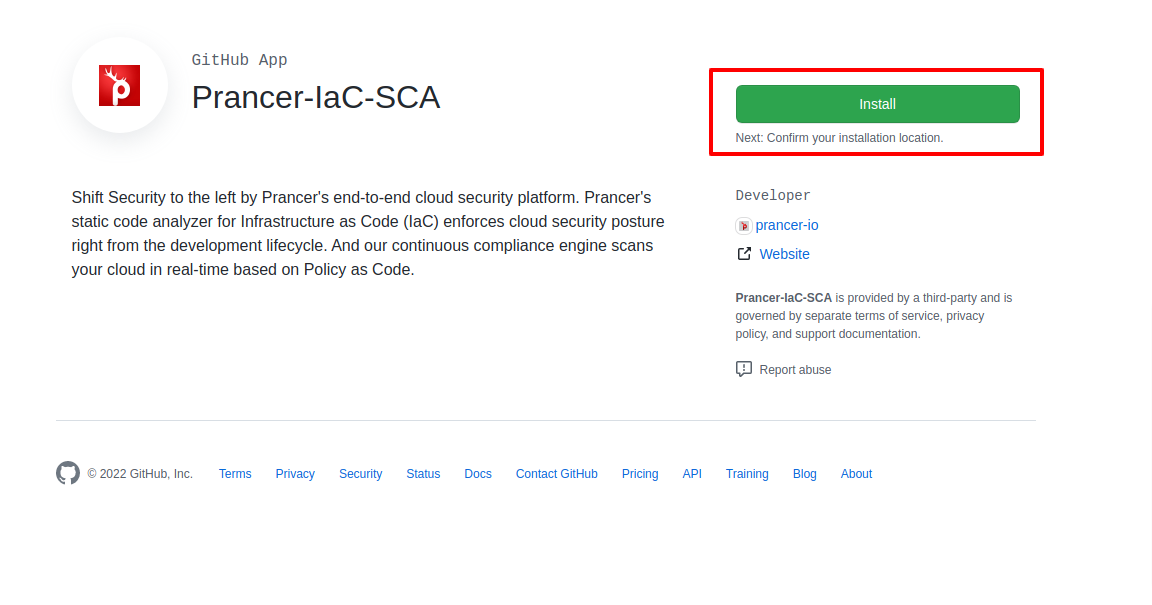
1) Install Github App in organization repository.
- Open the prancer github application link, https://github.com/apps/prancer-iac-sca
- After open above link, click on "Install" button.
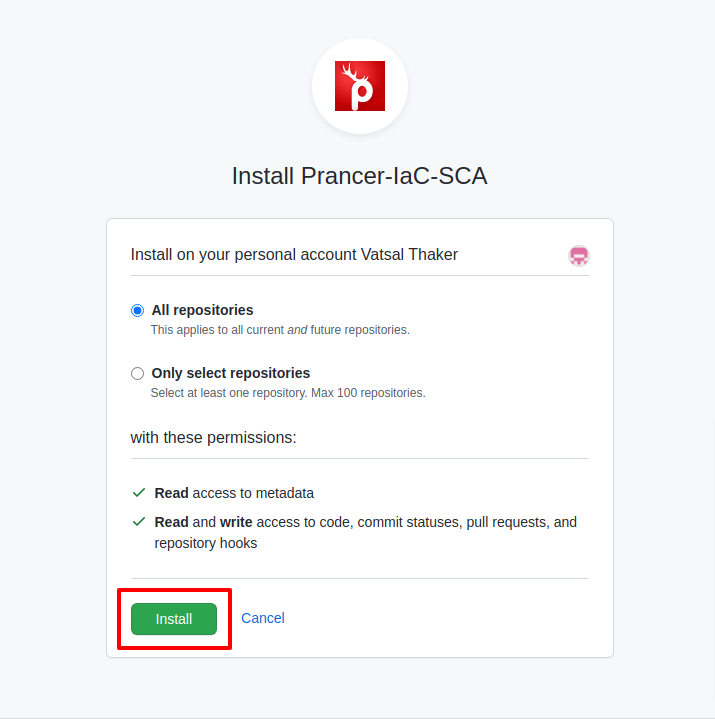
- You will see your repository and the organizations list. You can install the github application in specific repository or all the repository in your organization.
2) Create a collection from Configuration Wizard page
- Click on,
Admin -> Configuration Wizardmenu. - Enter the collection name, select
ÌACoption and click onNextbutton. - Authenticate to Github server, select the repository from the dropdown list and click on "Finish" button.
- It will create new collection and configure the master snapshots, master compliance and connector files.
- For more details, click here
3) Enable Github autofix feature for created collections
- Open the collection page from,
Admin -> Collectionmenu. - Search for your created collection and click on the
Collection Configuration.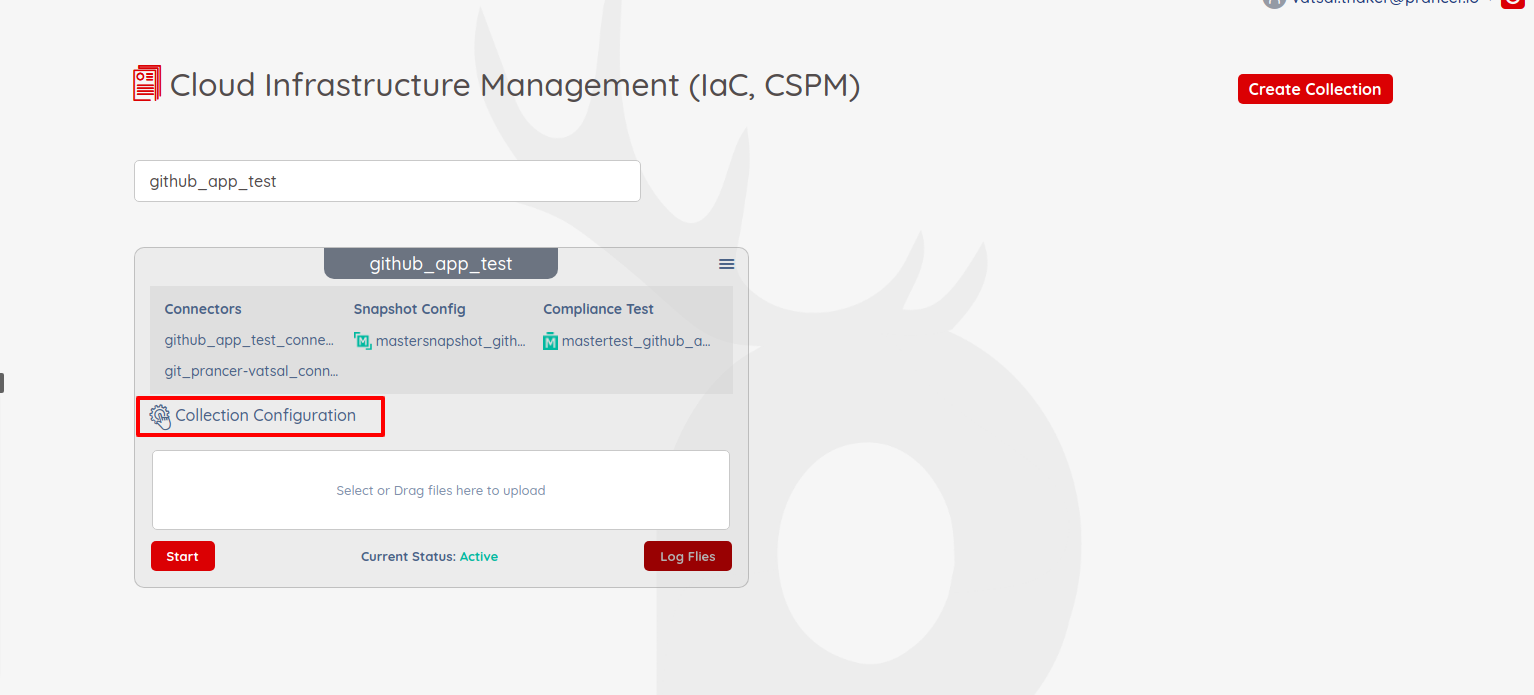
- Add the configuration
autofix_prwithtruevalue and save the changes.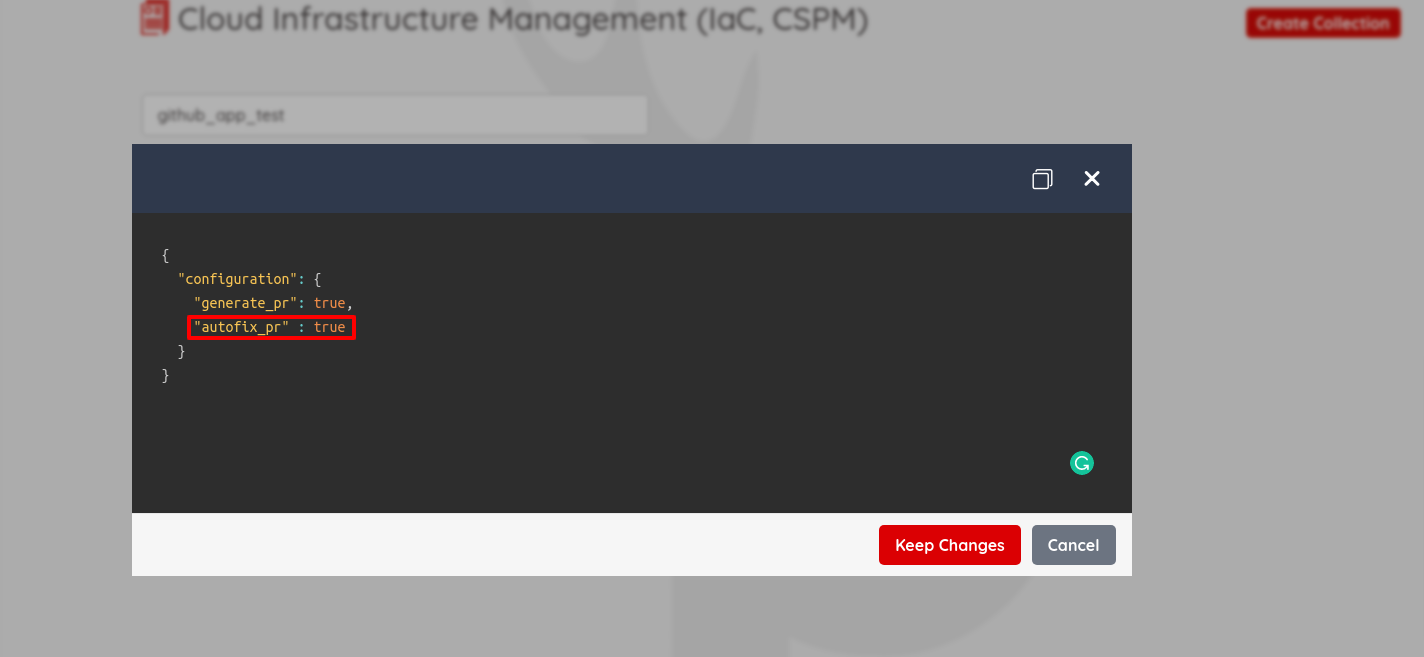
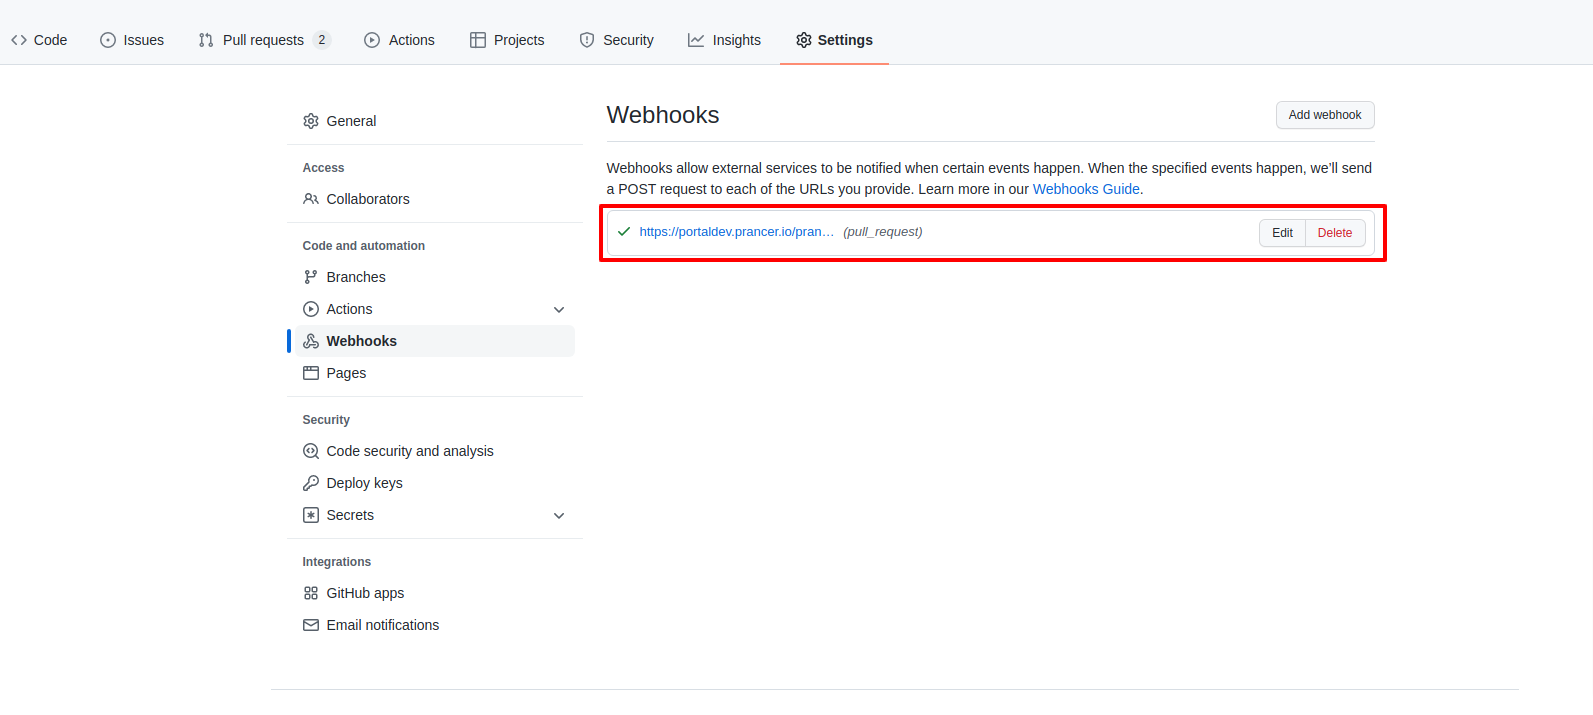
- It will create one webhook into your repository.
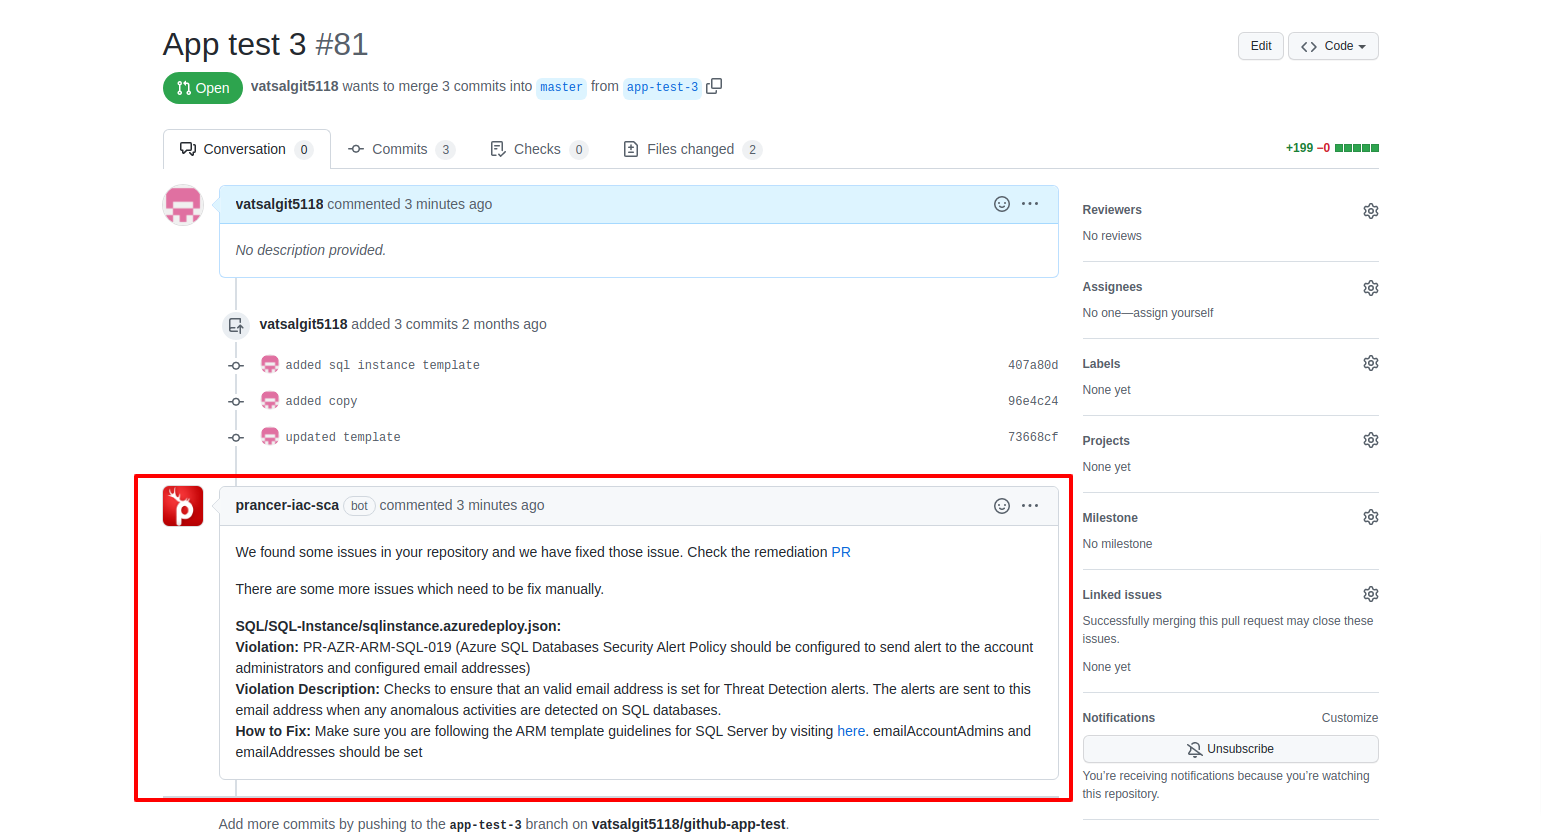
4) Test your Github App Integration
- At time of creating the configuration wizard ( step #2 ), you have to specify the branch name to run compliance on specific branch.
- After enabling
Autofix PRoption, whenever new Pull Request creates in your repository with that specified branch as destination branch, then github app will validate the changed/new files contains in pull request, autofix the issues in it and create new pull request with fixed code. - After creating the PR to specified branch, you will see the comment in pull request about auto fixes of the issues.