Third Party Integrations
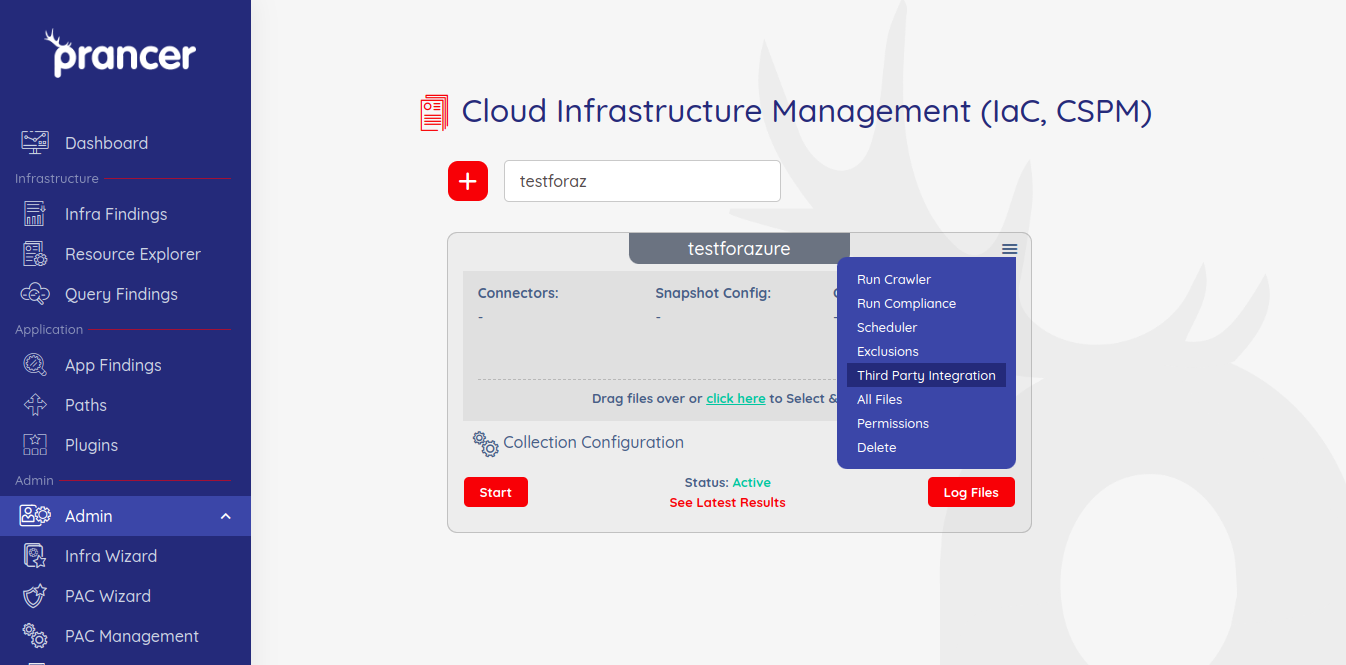
This page describes the process of integrating third-party tools like Jira, Azure Board, Slack, and Teams with Prancer for a collection. The user can initiate any integrations by clicking on the drop-down in collections and choosing Third Party Integrations. The integration process involves providing details like URL, project, username, and API key. For Jira and Azure Board, the user can select the severity of the cases that have to be captured and choose the issue types, labels, and status available for the given account. Once the details are selected and the integration is complete, the configuration is added and can be utilized on creating issues.
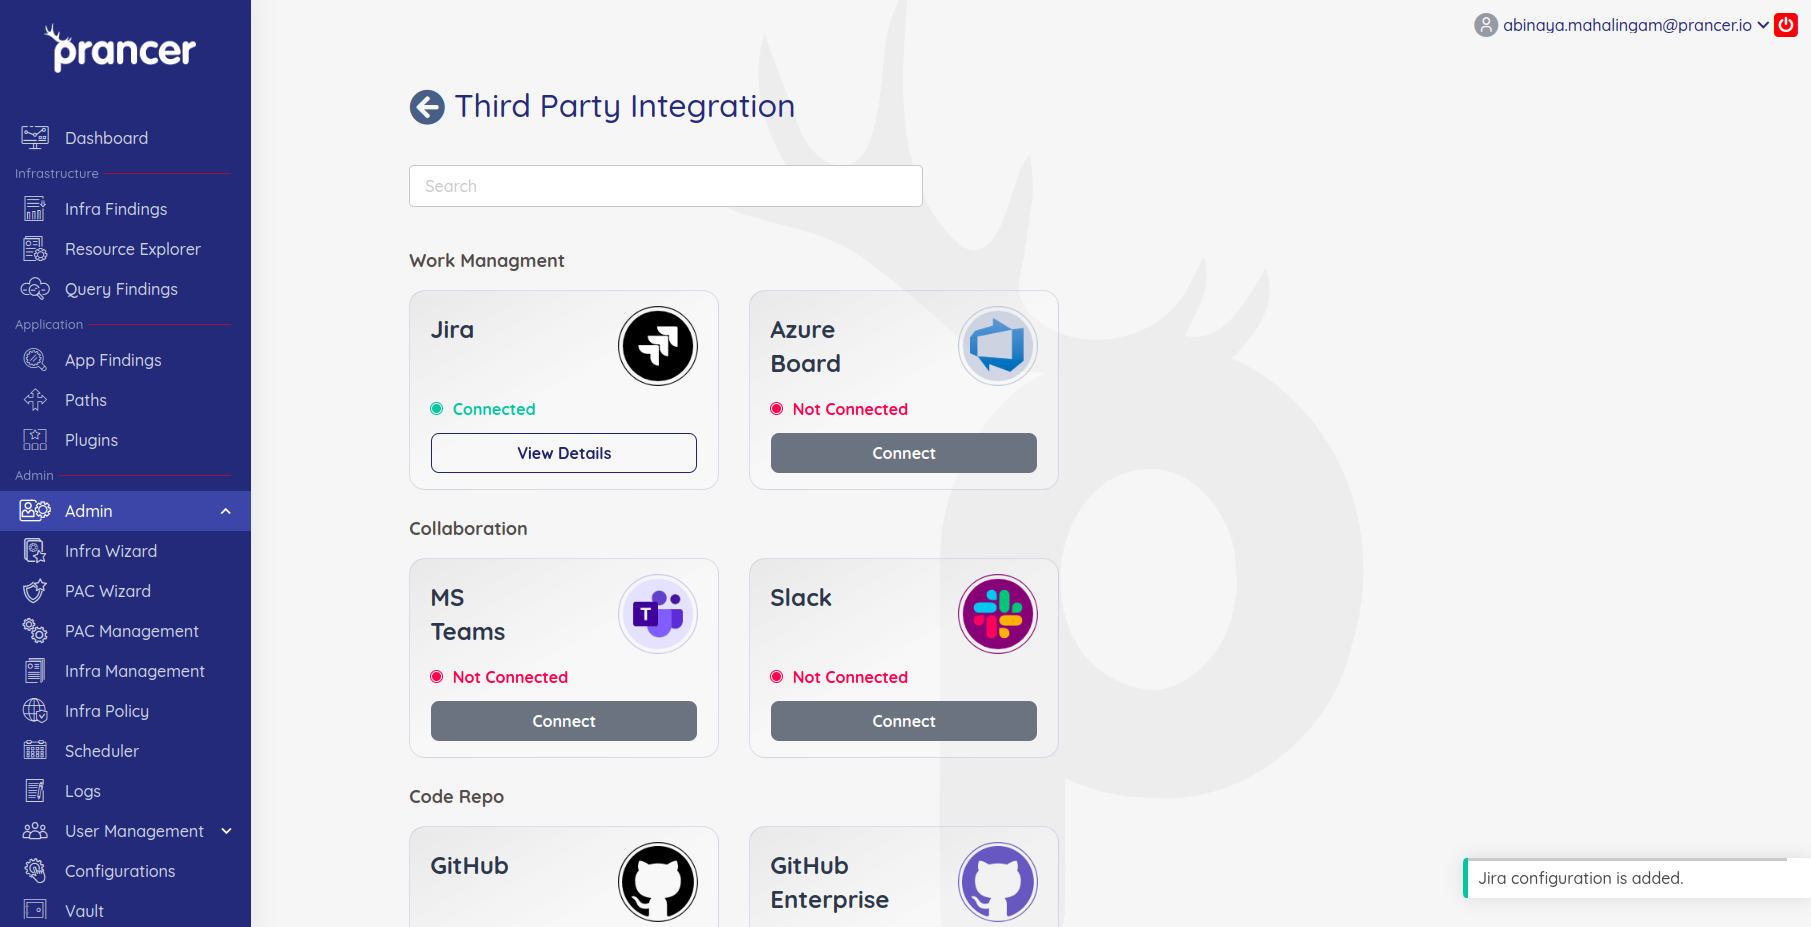
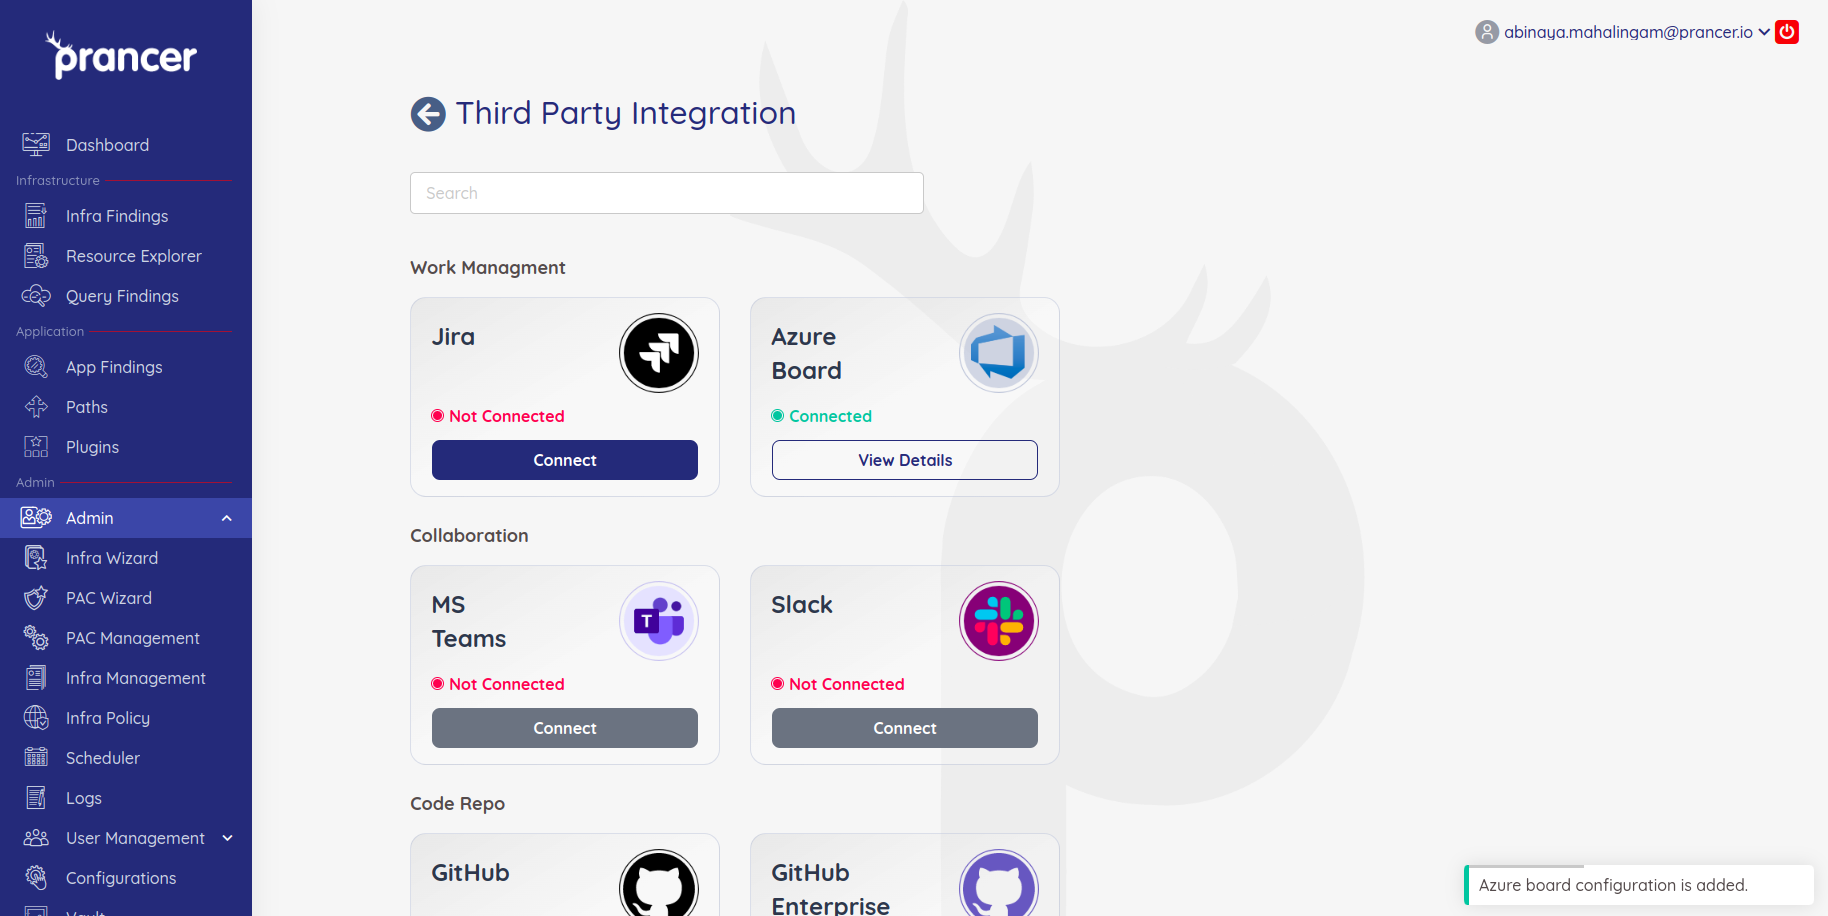
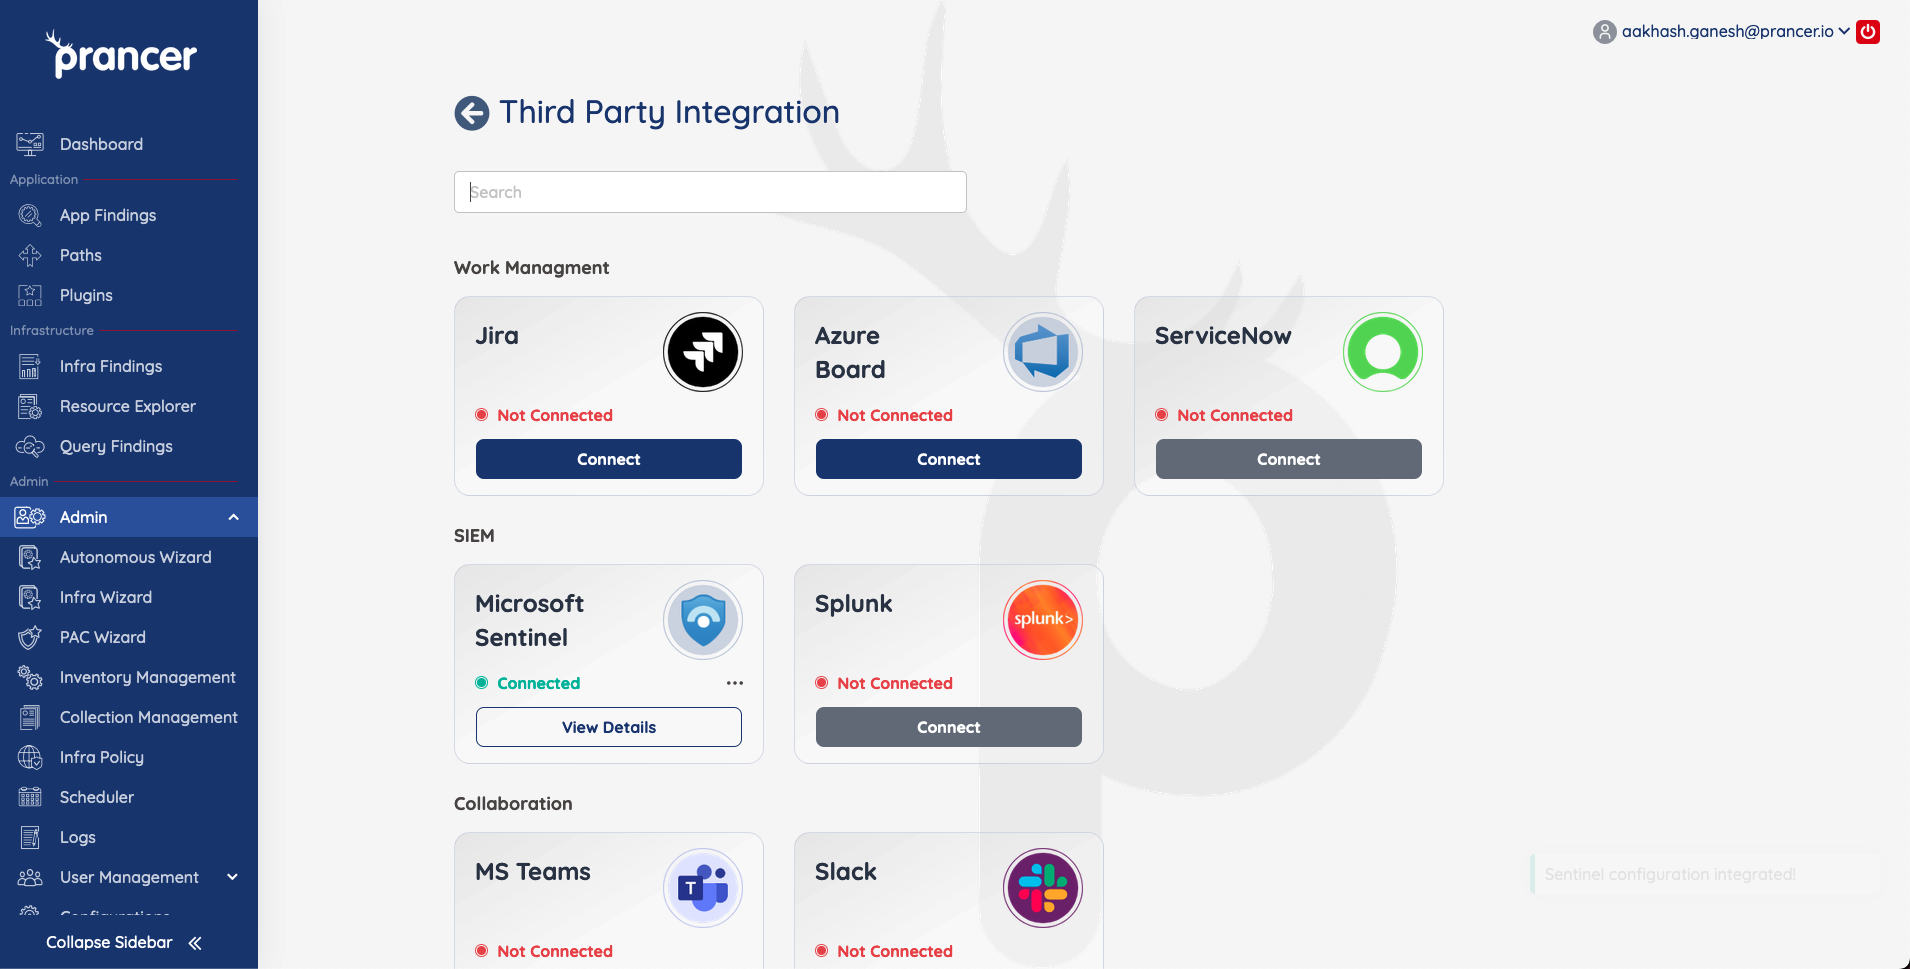
The third party integration page lists all possible integrations that can be done for a collection. Prancer has created integrations with different ticketing tools like Jira,Azure Board and notification tools like Slack and teams. Prancer also has various git repositories integrations to providers like GitHub,GitLab and BitBucket.
Ticketing Management
Setup
To initiate any integrations, click on the drop-down in collections and choose Third Party Integrations.
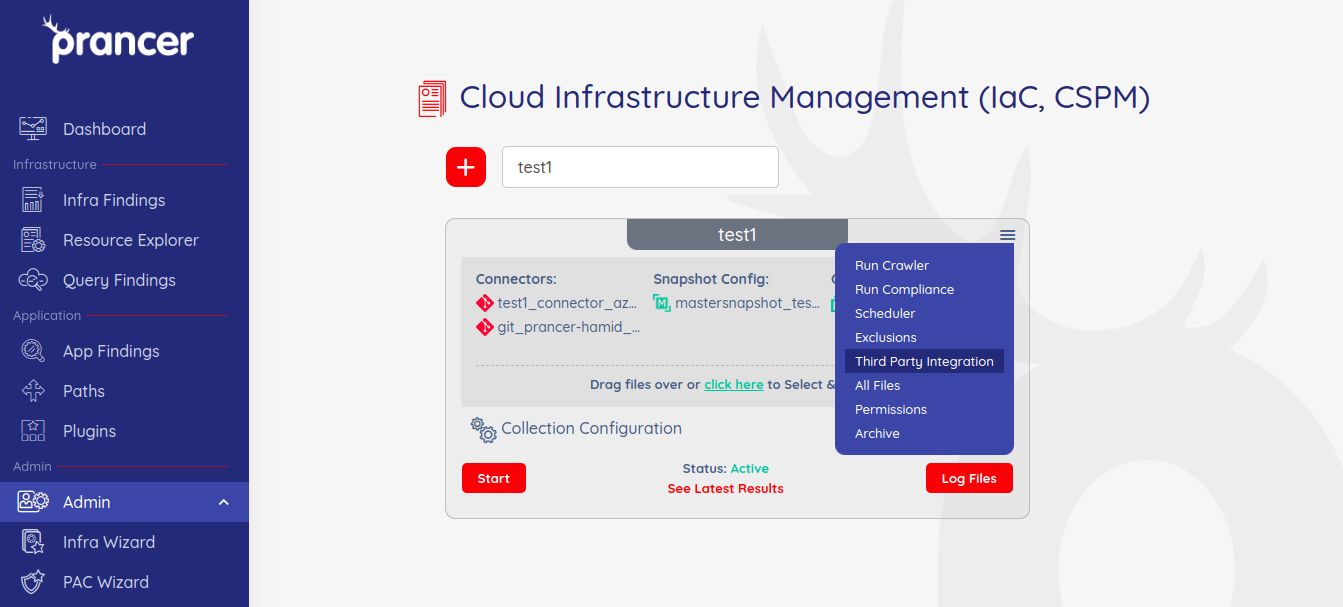
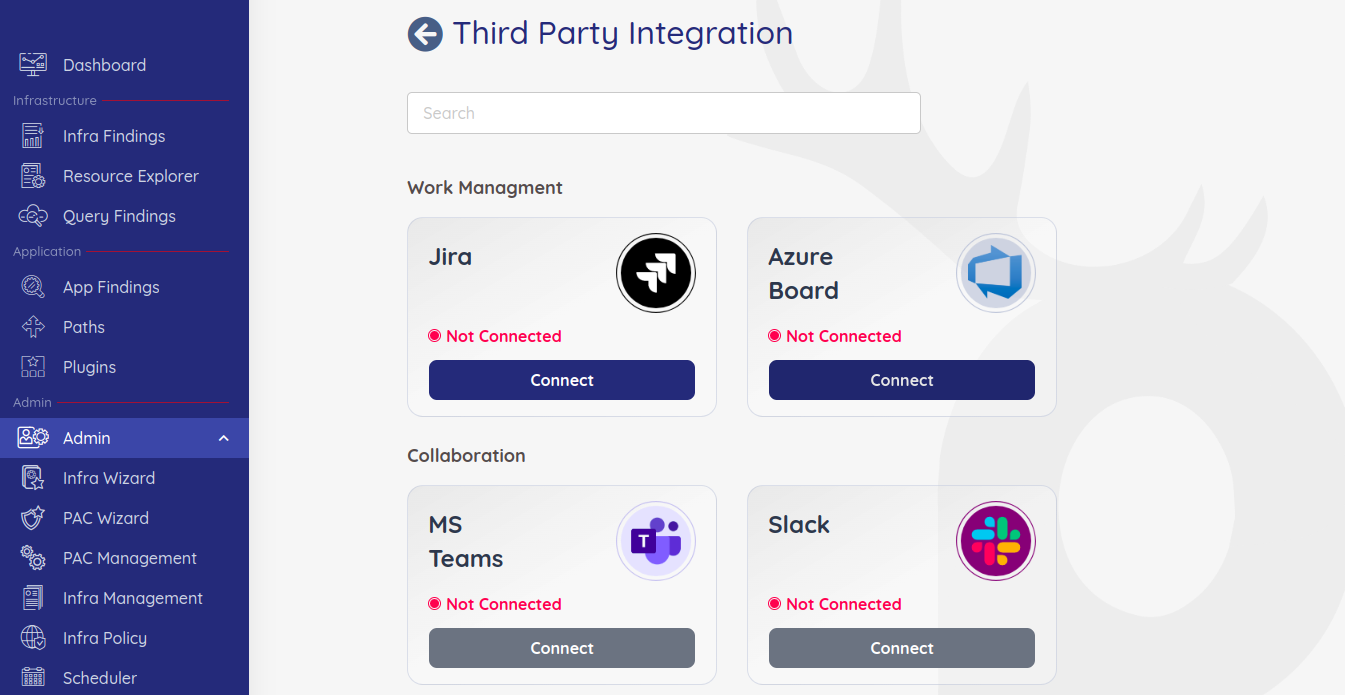
The page below appears, click connect on any available third party that you want to integrate.

Jira Integration
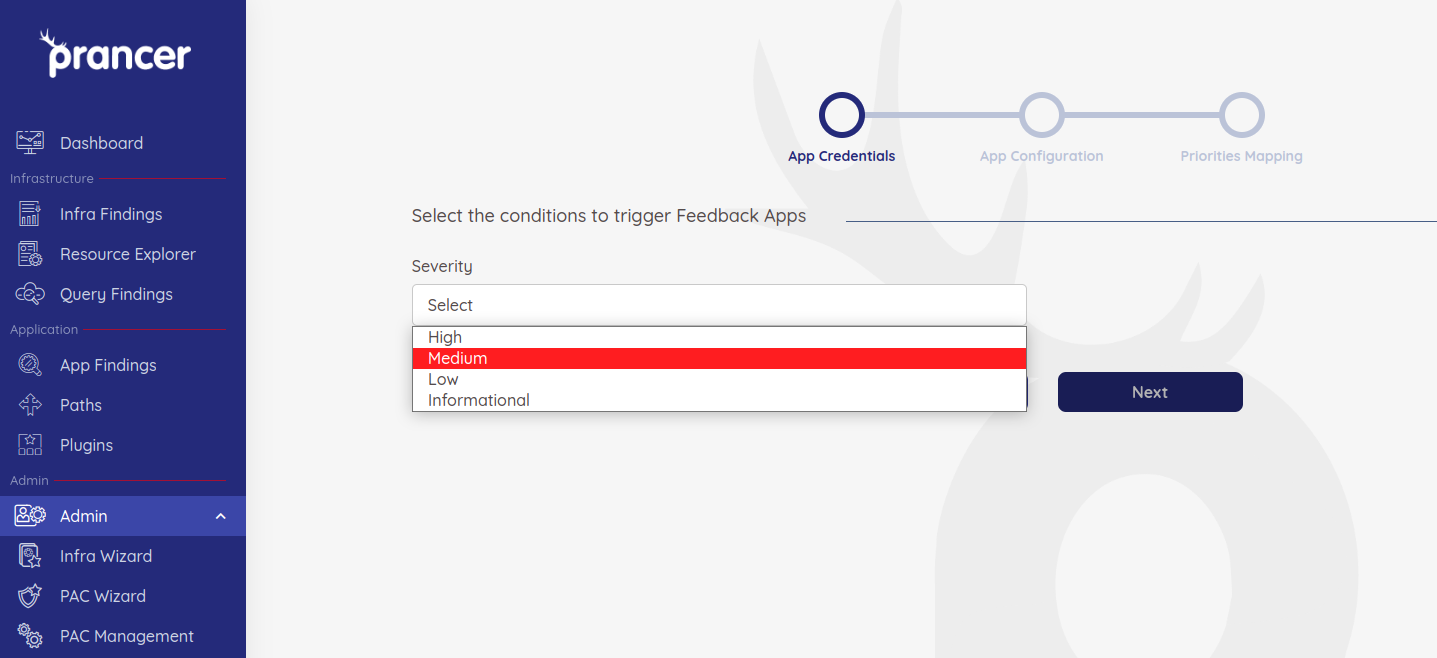
When integrating with Jira, the first page prompts for the Severity of the cases that has to be captured.

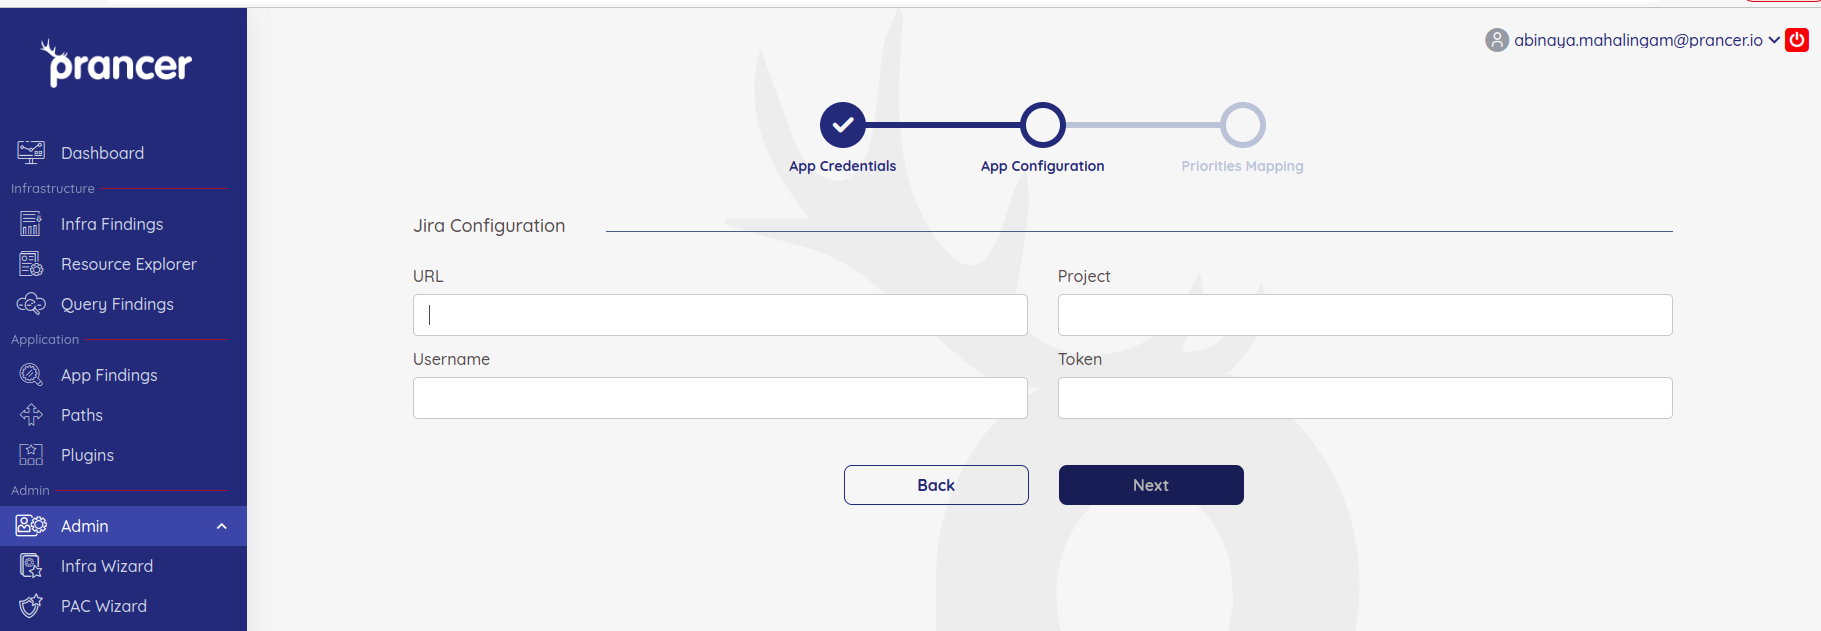
In order to establish the connection, the next page prompts for the URL, Project, Username and Token(API-Key). Where to find this info -
Create an API token from your Atlassian account:
- Log in to https://id.atlassian.com/manage-profile/security/api-tokens.
- Click Create API token.
- From the dialog that appears, enter a memorable and concise Label for your token and click Create.
- Click Copy to clipboard, then paste the token to your script, or elsewhere to save:
- New API token that you can view and copy to clipboard. Warning to securely record the API token
- For security reasons it isn't possible to view the token after closing the creation dialog; if necessary, create a new token. You should store the token securely, just as for any password.
Upon successful Authentication, now you will be able to choose the Issue types, labels and status that are available for the given account.
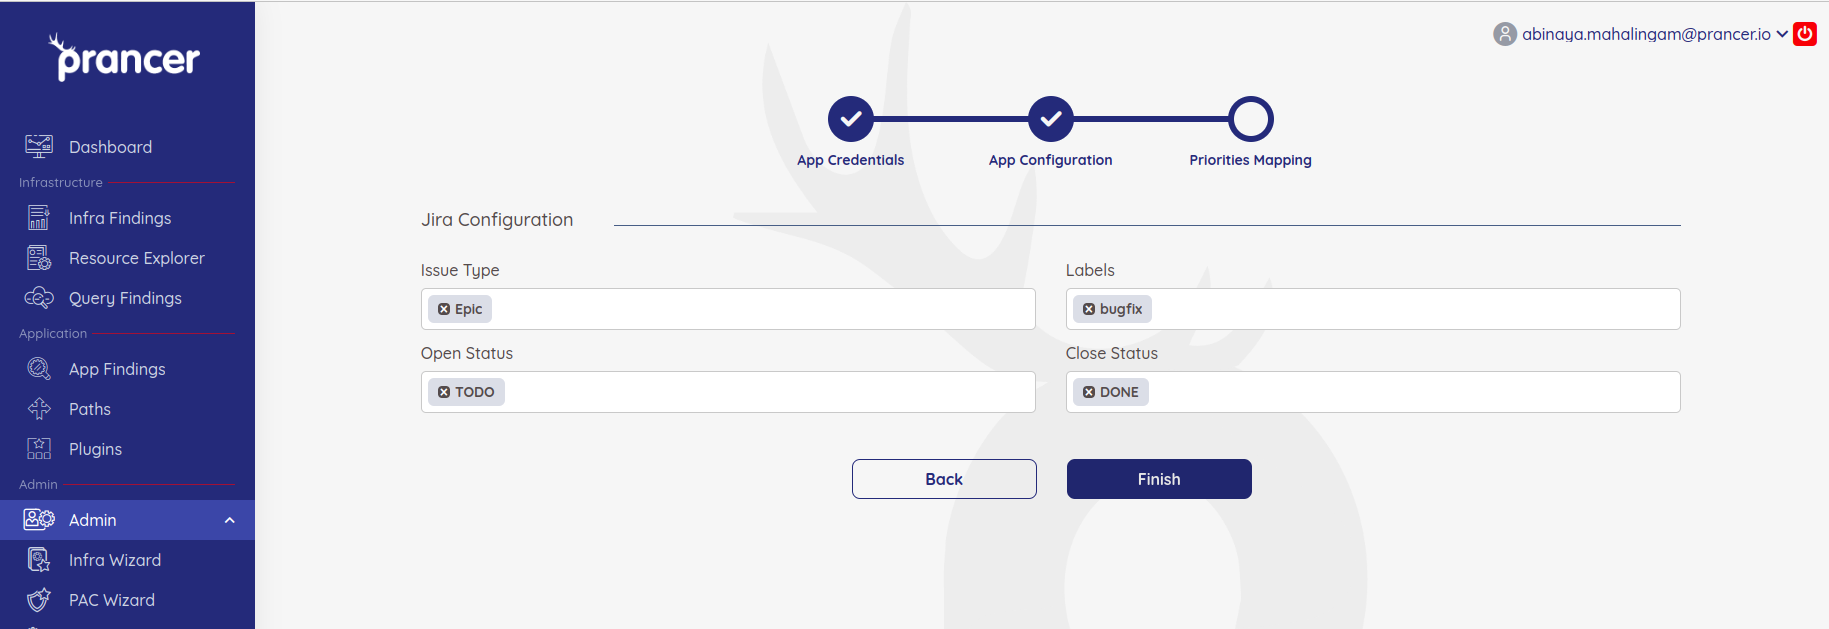
Once the details are selected and when you click on Finish, the integration with Jira is complete.
The Jira configuration is now added and it will be utilised on creating issues.
Azure Board Integration
To integrate with Azure Board, follow the similar steps like Jira. Click on the drop-down in collections and choose Third Party Integrations.
The page below appears, click connect on any available third party that you want to integrate.
When integrating with Azure Board, the first page prompts for the Severity of the cases that has to be captured.
In order to establish the connection, the next page prompts for the URL, Project, Username and Token(API-Key).
Create a personal access token (PAT)
- Sign in to your organization (https://dev.azure.com/{yourorganization}).
- From your home page, open user settings and select Personal access tokens.
- Select + New Token.
- Name your token, select the organization where you want to use the token, and then set your token to automatically expire after a set number of days.
- Select the scopes for this token to authorize for your specific tasks.
- For example, to create a token to enable a build and release agent to authenticate to Azure DevOps Services, limit your token's scope to Agent Pools (Read & manage). To read audit log events, and manage and delete streams, select Read Audit Log, and then select Create.
Note
• You may be restricted from creating full-scoped PATs. If so, your Azure DevOps Administrator in Microsoft Entra ID has enabled a policy which limits you to a specific custom defined set of scopes. For more information, see Manage PATs with policies/Restrict creation of full-scoped PATs. For a custom defined PAT, the required scope for accessing the Component Governance API, vso.governance, isn't selectable in the UI. • When you're done, copy the token and store it in a secure location. For your security, it doesn't display again. • Screenshot showing how to copy the token to your clipboard.
Warning
• Treat and use a PAT like your password and keep it a secret. • Use your PAT anywhere your user credentials are required for authentication in Azure DevOps.
Important
• For organizations backed by Microsoft Entra ID, you have 90 days to sign in with your new PAT, otherwise it's considered inactive. For more information, see User sign-in frequency for Conditional Access.
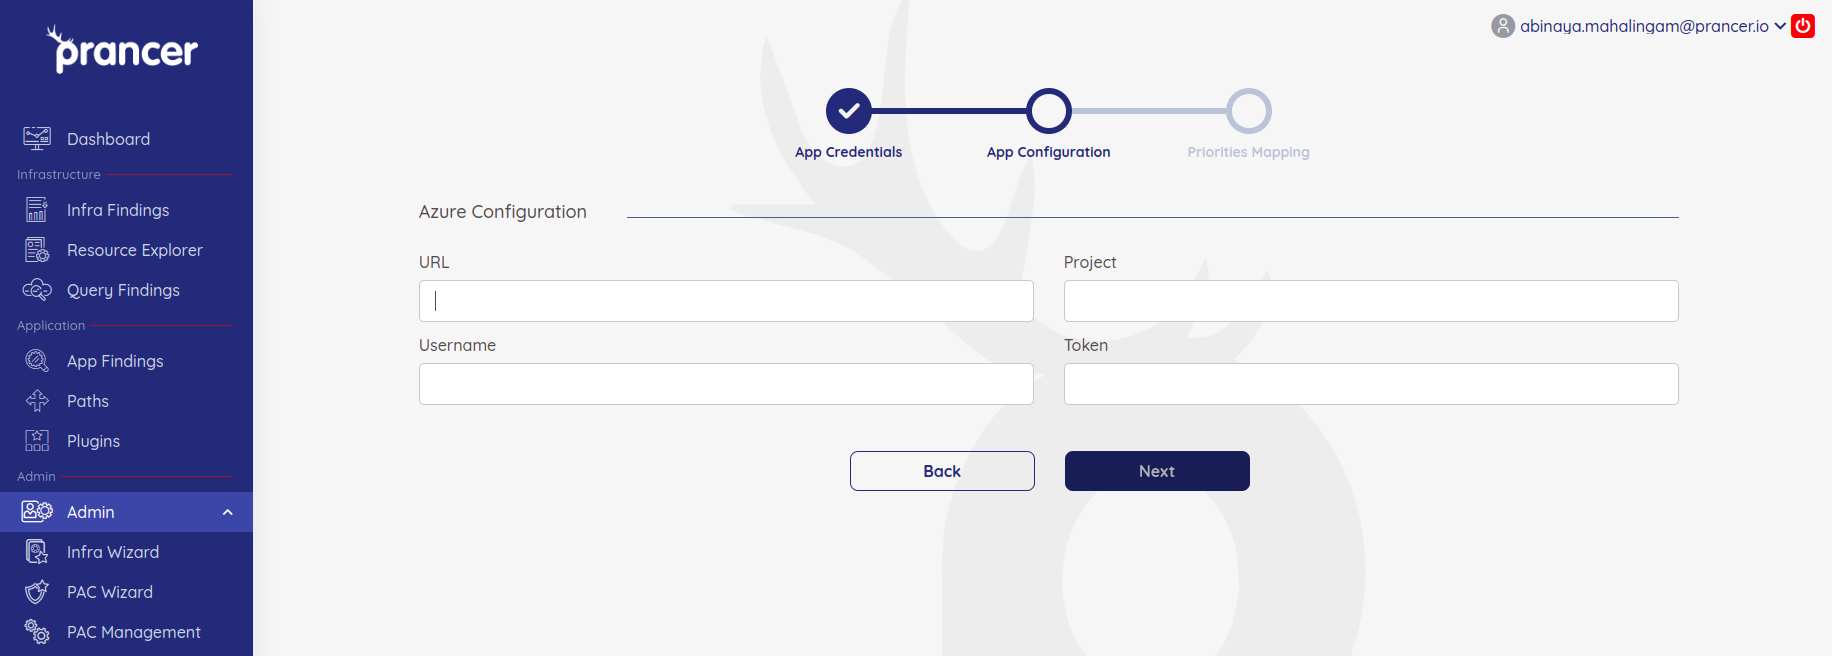
Upon successful Authentication, now you will be able to choose the Project, Workitems,status and work fields that are available for the given account.
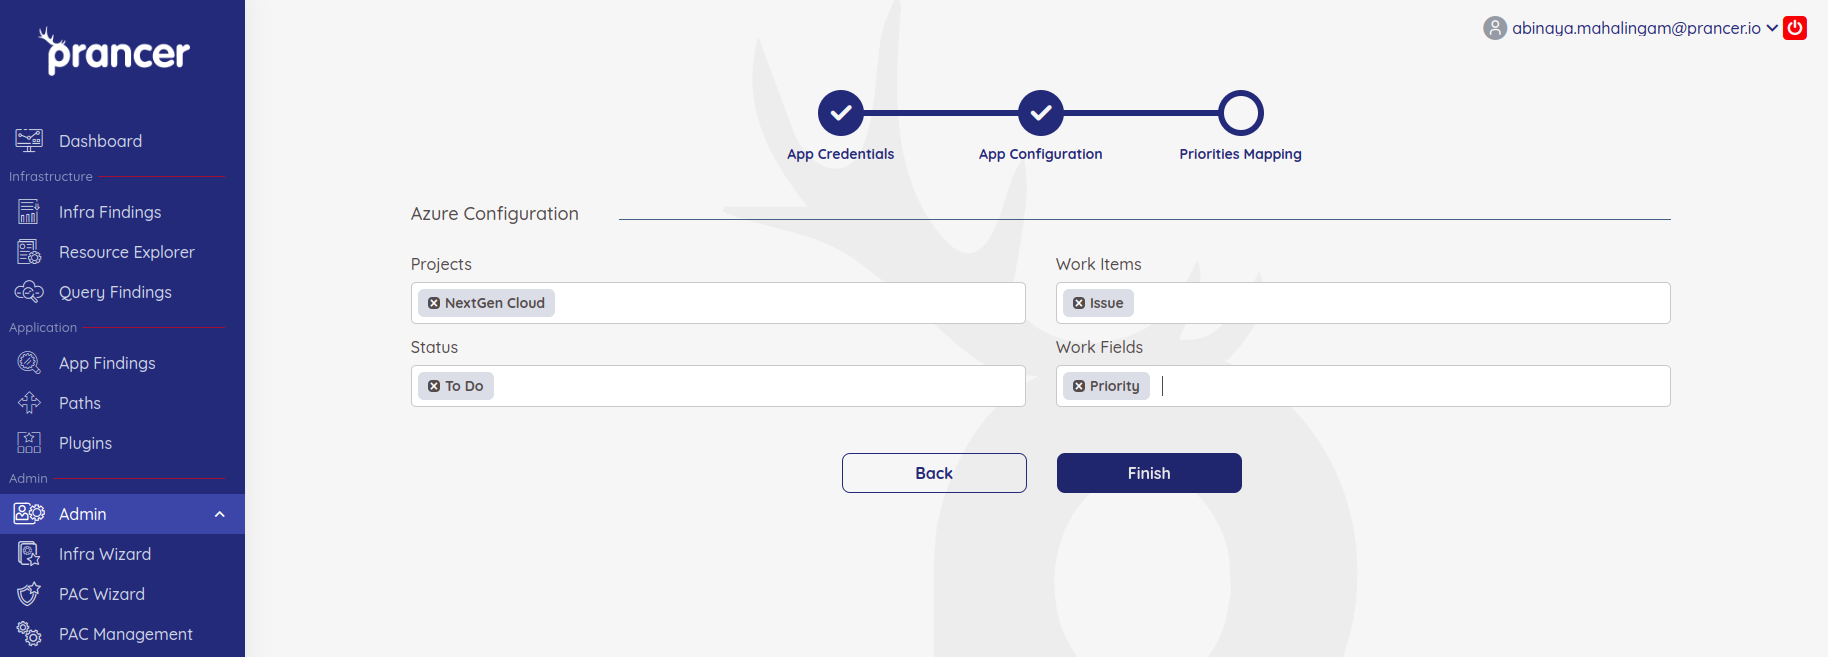
Once the details are selected and when you click on Finish, the integration with Azure Board is complete.
The Azure Board configuration is now added and it will be utilised on creating issues.
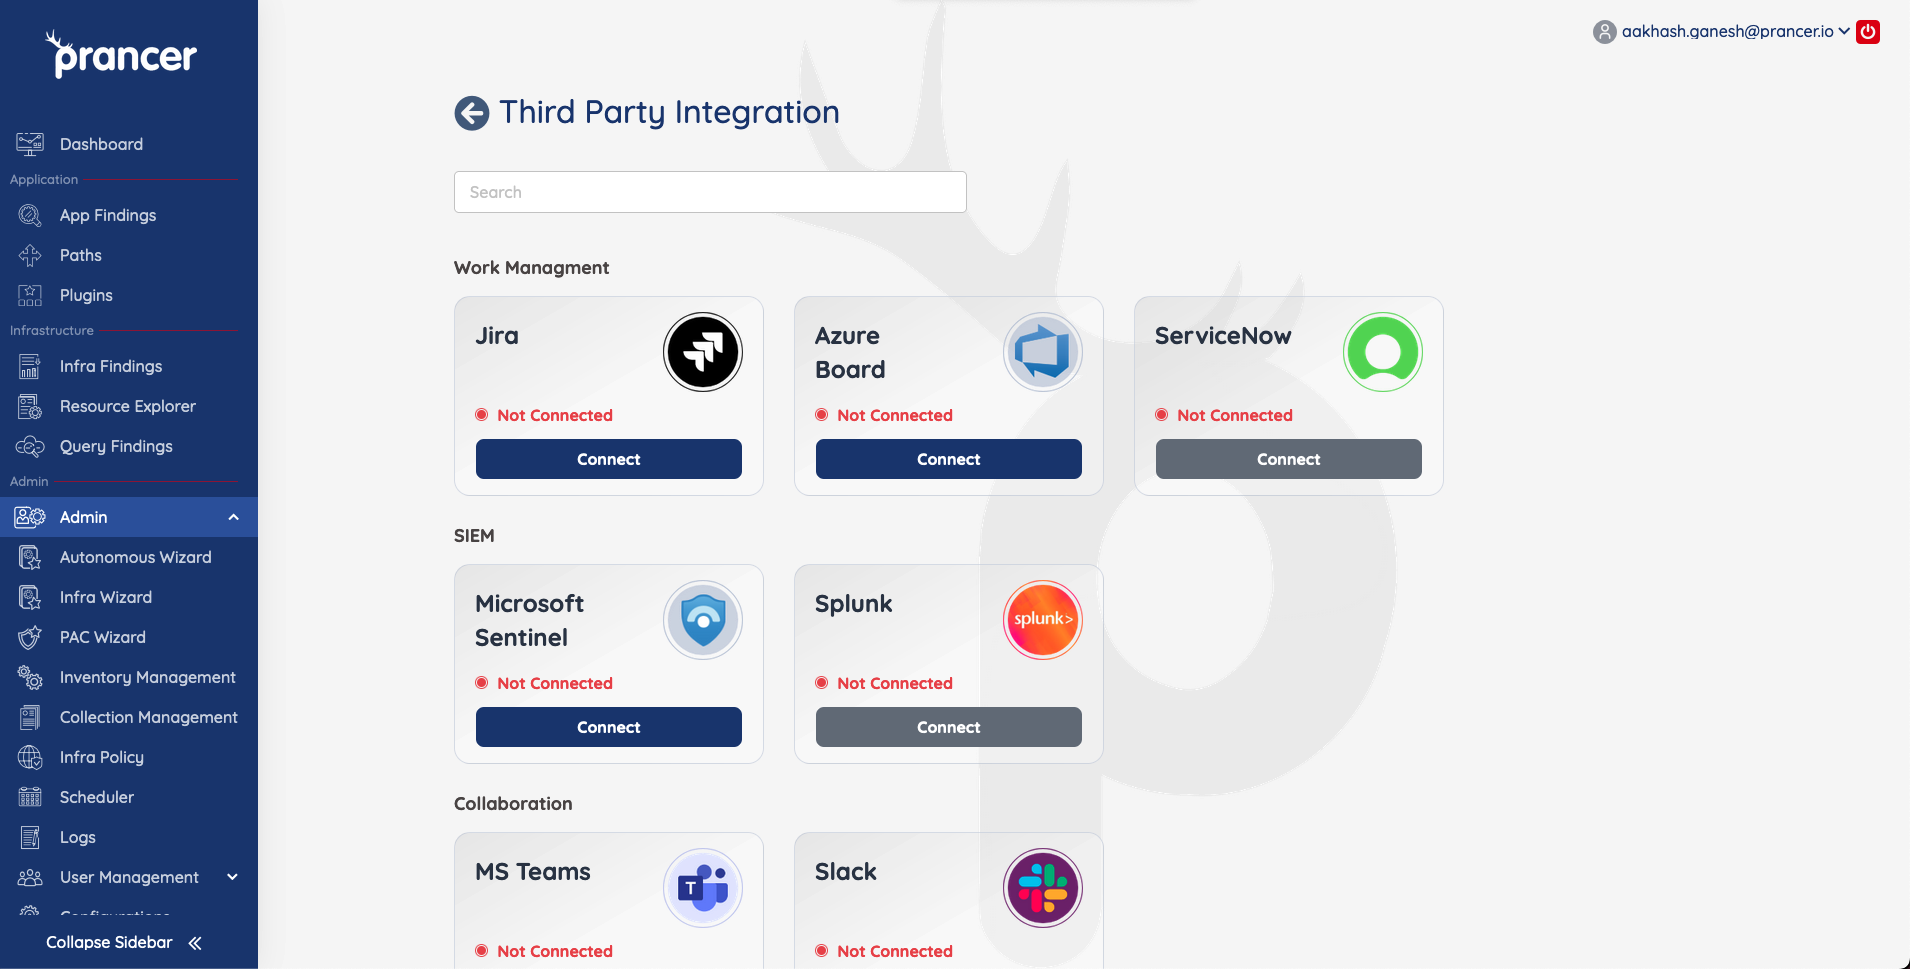
Third Party Integrations - SIEM.
Prancer supports some SIEM tools with plans to integrate more in the future.
Microsoft Sentinel
To integrate with Microsoft Sentinel and have the ability to view your results in Sentinel. Follow the steps outlined below. Click on the hamburger menu for your collection in the inventory management page.
Select Connect in the Microsoft Sentinel tile.
Choose the Azure Connector that you would like to use to connect to Sentinel. (You can connect to more subscriptions by adding more connections to your PAC collection )
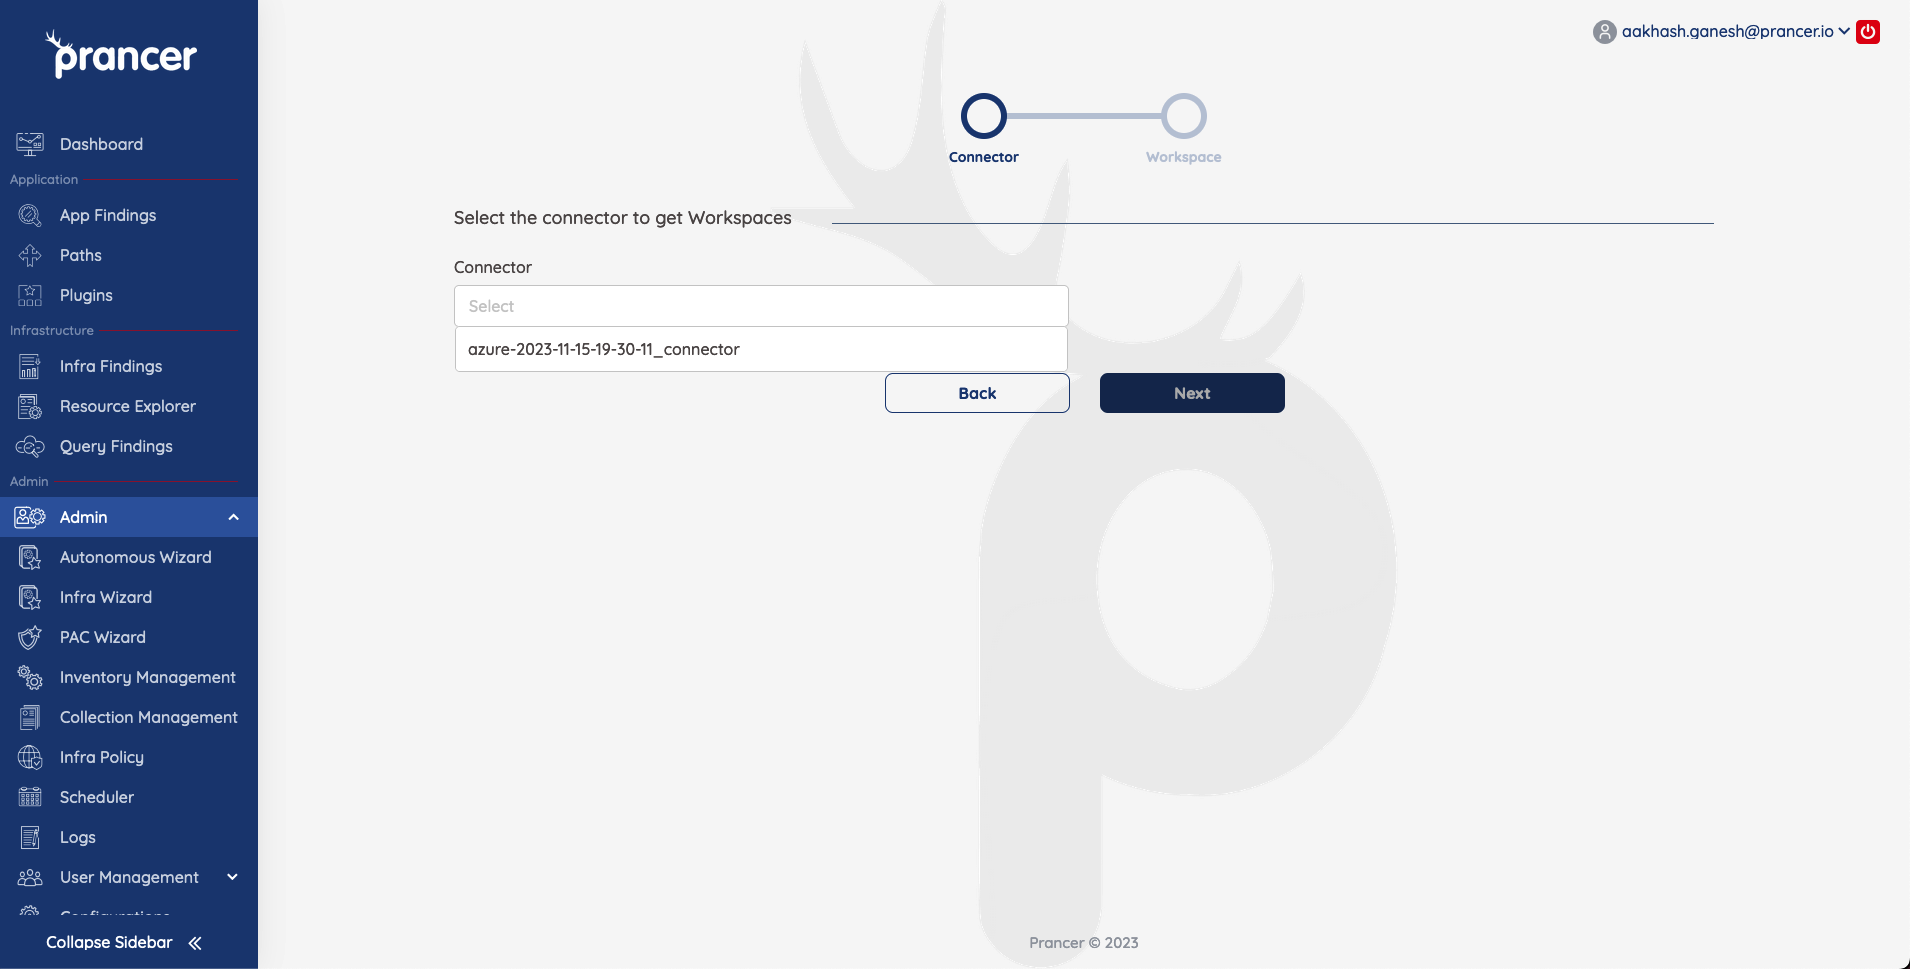
Select the Workspace that you scan result should get sent to.

You will now have you sentinel connection created and ready to go. The next time you run a scan for that collection, all the scan data will also get sent over to your sentinel instance. To get more information on how to use the Sentinel Integration. Refer to Sentinel Integration
Tips
Configure Azure Sentinel Workspace
Before integrating, ensure you have an Azure Sentinel workspace set up. Create a workspace in the Azure portal, selecting the appropriate subscription, resource group, and region.
App Registration and Access Grant
- Register your application in the Azure portal under App registrations.
- Grant access to your Sentinel workspace by navigating to its settings, ensuring your app can push logs via the Client Credentials OAuth flow.
Add Sentinel Connector
- Go to the Third Party Integration page on the Prancer portal.
- In the SIEM section, select Sentinel and follow prompts to add the Sentinel connector.
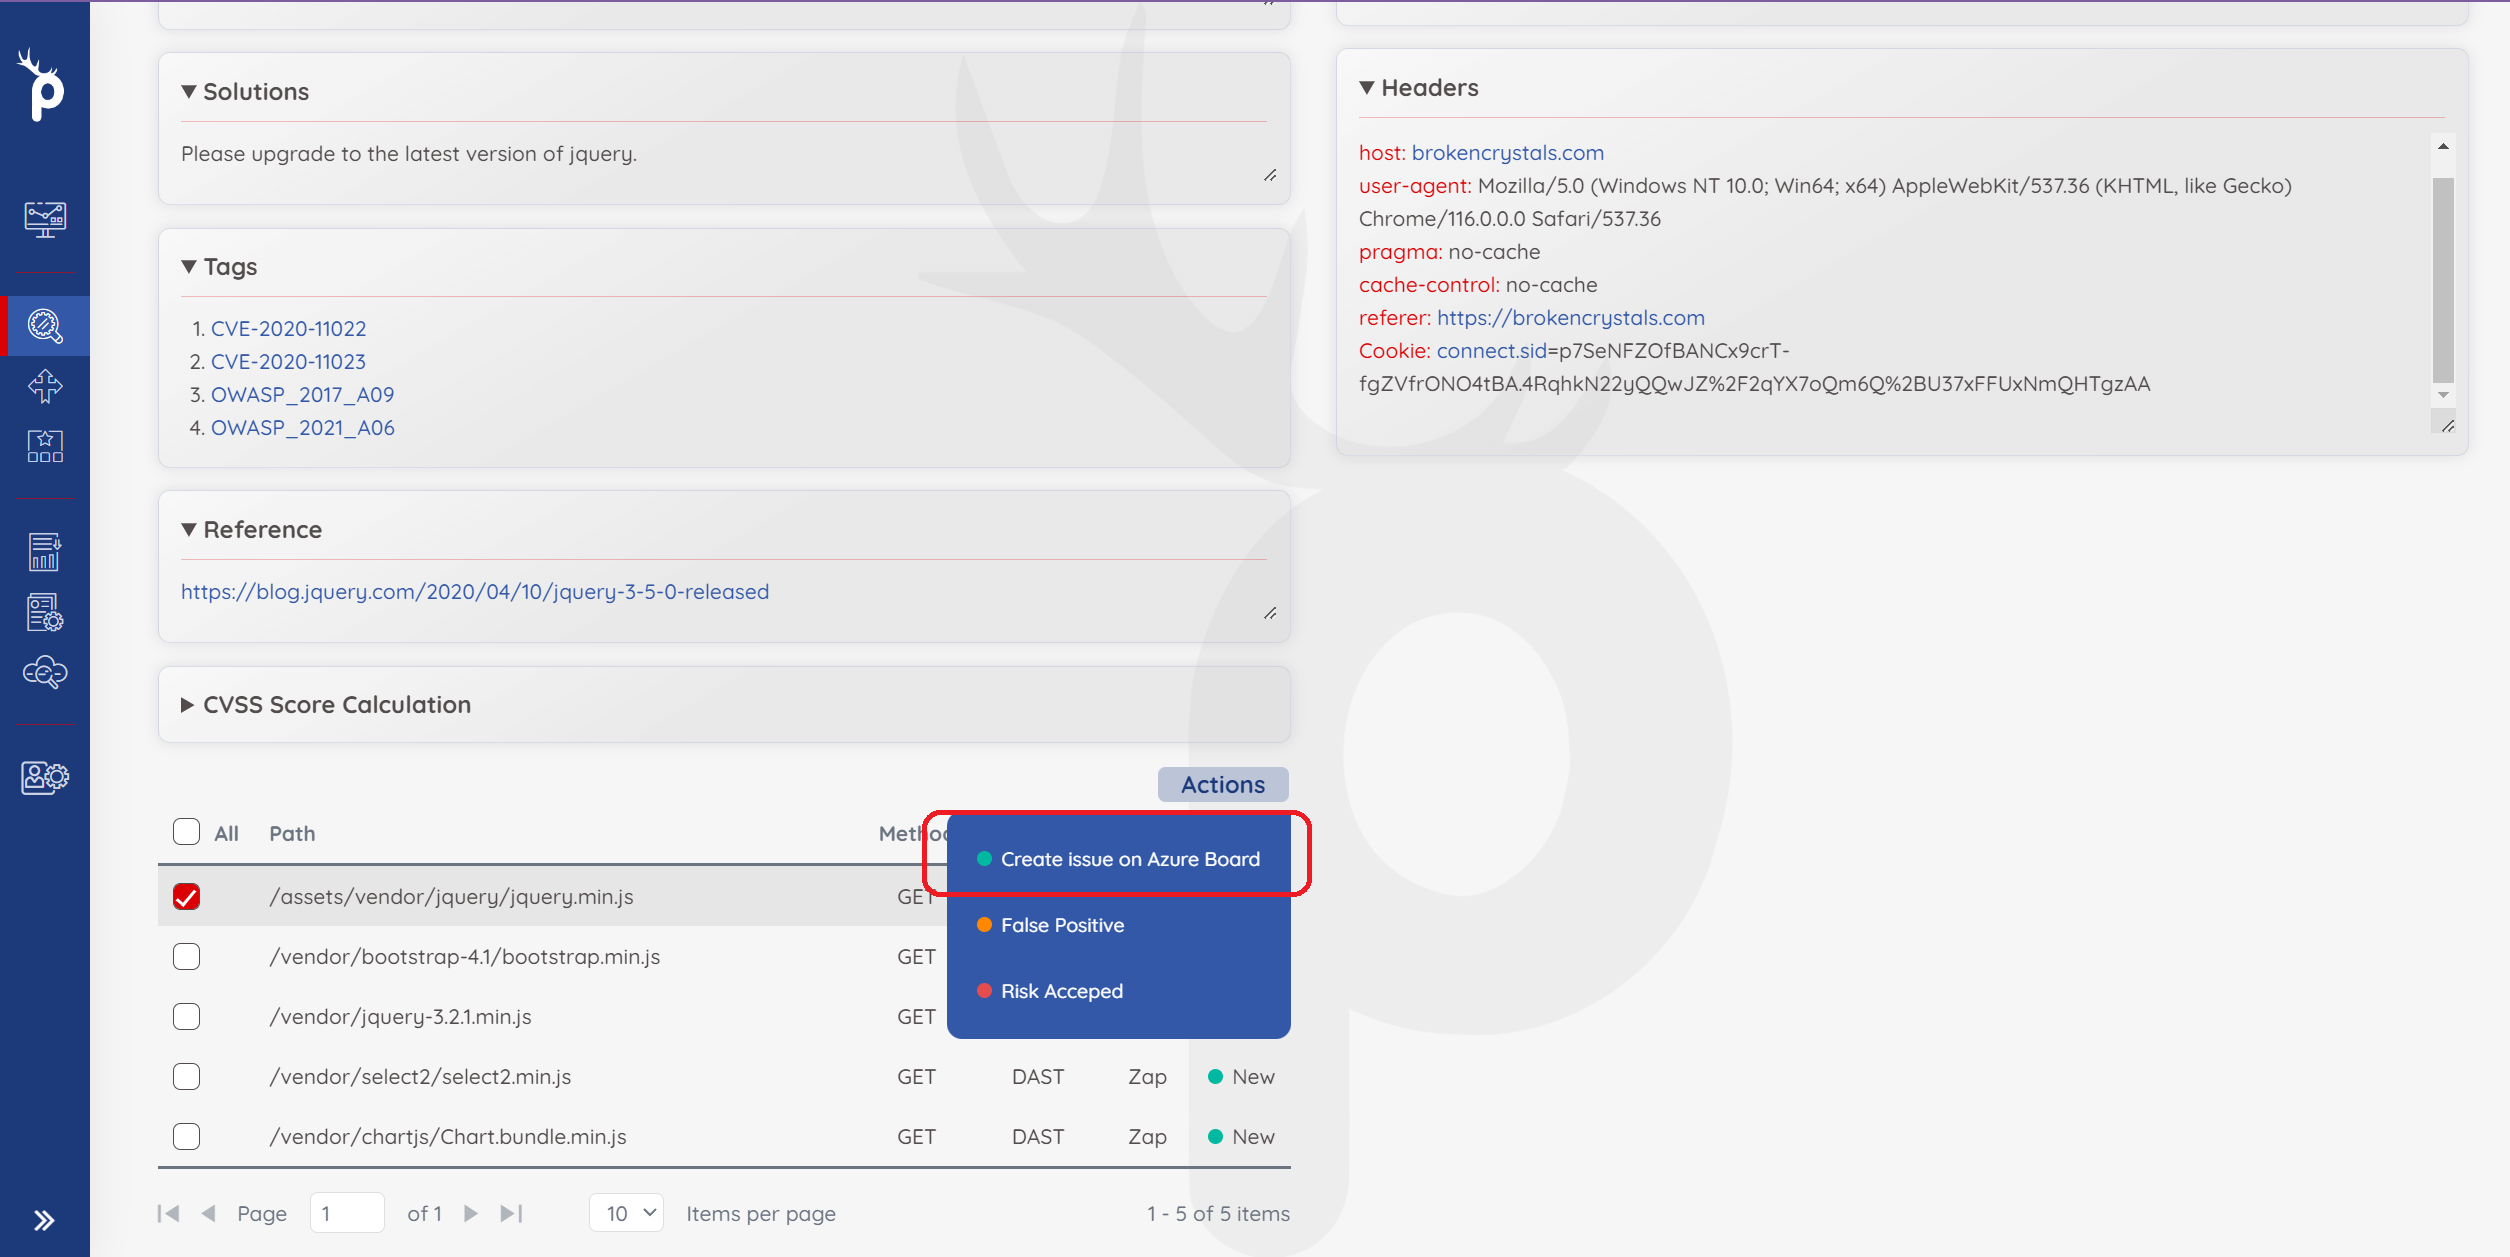
Making tickets
Tickets can be made from the indivisual findings page for the particular issue. By selecting the URL and using the actions menu, click Create Issue on __ for the connected platform.