PAC Configuration Wizard for GCP Cloud
Introduction
Prancer Cloud Security Solution's Cloud Security Posture Management (CSPM) functionality provides an automated way to identify and remediate security risks in cloud environments. With the ability to scan a wide range of your GCP cloud resources, the CSPM engine integrated to the Prancer platform can identify misconfigurations, vulnerabilities, and compliance issues that may pose a risk to your environment. The findings are then presented in a well-defined report page, making it easy for security teams to quickly take action and improve the overall security posture of your GCP cloud environment.
This page describes how organizations can use their existing GCP tenant to run a penetration testing instance, with PAC generating a manifest file based on YAML format that provides all the details of the pentesting job, including the application information, scanner setup, target selection, and authentication configuration. Prancer PAC engine then communicates with the GCP tenant, creates the PAC scanner based on the configuration details, completes the pentesting scan, and displays the results on the "Pentest Findings" page.
In order to conduct this process, click on the "Pentest Wizard" from the side menu and follow these instructions.
Step 1 - Establish the connection to your GCP tenant
Select the "Google Cloud" from the target environment selection. You can use either an existing connection available for you or create a brand new connection to the GCP tenant.
Select the "Existing connection" and search for your connection in the box to use one of the existing connections.
To create a new connection, click on the "New connection" button. You need to fill out a few items to connect to your GCP tenant.
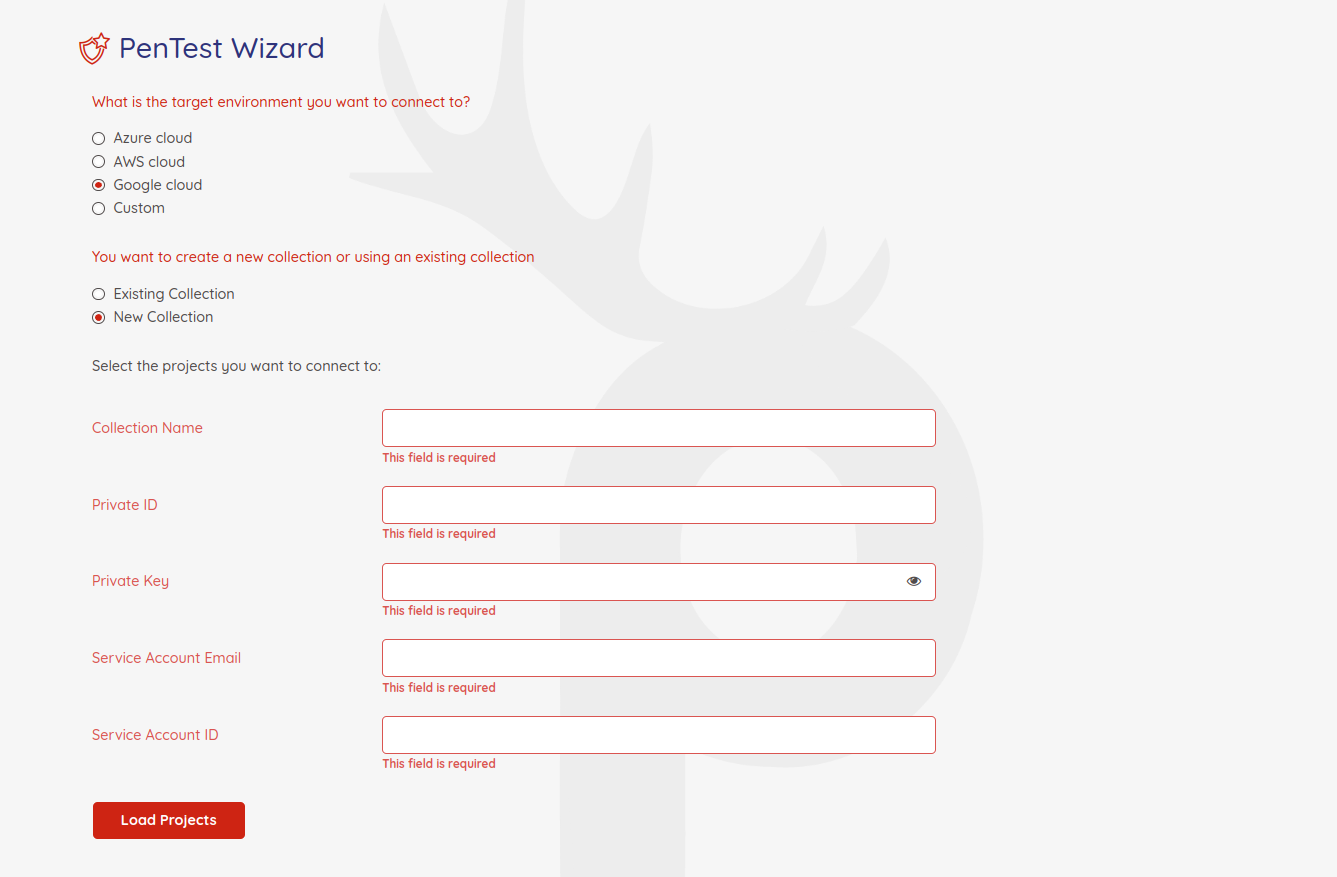
Prancer uses Service Account JSON to connect to the GCP tenant.
Collection Name: name of the collection you want to use for your Pentesting project. It will be used as an identifier for future use.
Private ID: Private key Id of the service account.
Private Key: Private key of the service account.
Service Account Email: Client email of the service account.
Service Account ID: Client id of the service account.
Permissions: The service account should have the proper permission on the IAM to read the resources and to be able to create pentest-related resources.
These are our recommendations for the Service Account permission to use in PAC:
-
Cloud Functions Service Agent: Gives Cloud Functions service account access to managed resources.
-
Kubernetes Engine Developer: Full access to Kubernetes API objects inside Kubernetes Clusters.
-
Service Account User: Run operations as the service account.
-
IAM Workload Identity Pool Viewer: Read access to workload identity pools.
-
Secret Manager Viewer: Allows viewing metadata of all secret manager resources
When you fill out the required information, click on the "Load Projects" button to load all the projects the service account has access.
Select the project you want to include in your "Collection" and hit the Next button.
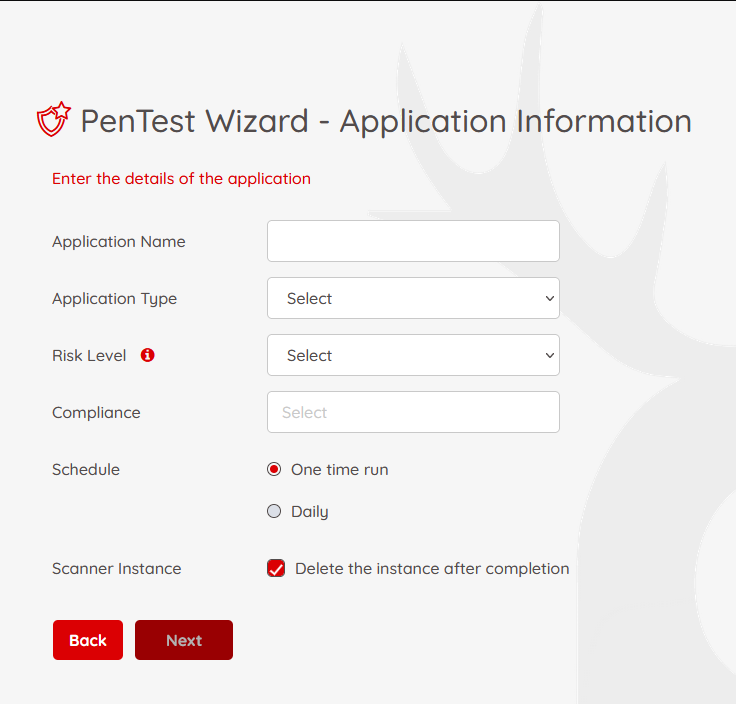
Step 2 - Application Information
On this page, we will fill out the basic information regarding the application you want to do the pentesting.
-
Application Name: give your application a name for future references
-
Application Type: PAC supports Web, Open API, and Soap API applications for scanning
-
Risk Level: There are three risk levels available for pentesting:
-
Safe: running pentesting rules which are safe for production instances.
-
Attack: When you run the pentesting in an attack mode, it will insert data into your forms. This is the best choice when you are pentesting on lower environments and have existing crawls.
-
Standard: doing safe and attack pentesting together. It is recommended for all lower environments.
-
Compliance: Which compliance do you have to follow. You can filter your applications based on the selected compliance later.
-
Schedule: How often do you want to run the pentesting? Is it just one time run? or you want to put it on a scheduled bases
-
Scanner Instance: What to do with the scanner instance when the Pentesting is completed in your environment? You have the option to stop the scanner or delete that completely.
Note: PAC uses Google Kubernetes Engine (GKE) to run pentesting.
Step 3 - Scanner setup
You can use either an existing cluster from your GCP project or create a brand new cluster instance on the scanner setup page.
To use an existing pentest instance, select the option on the page. Then you need to choose the GCP Project, Region and the Cluster.

To create a new pentest instance, select the appropriate item on the page, and enter the Project and Region where you want to make the Kubernets cluster.
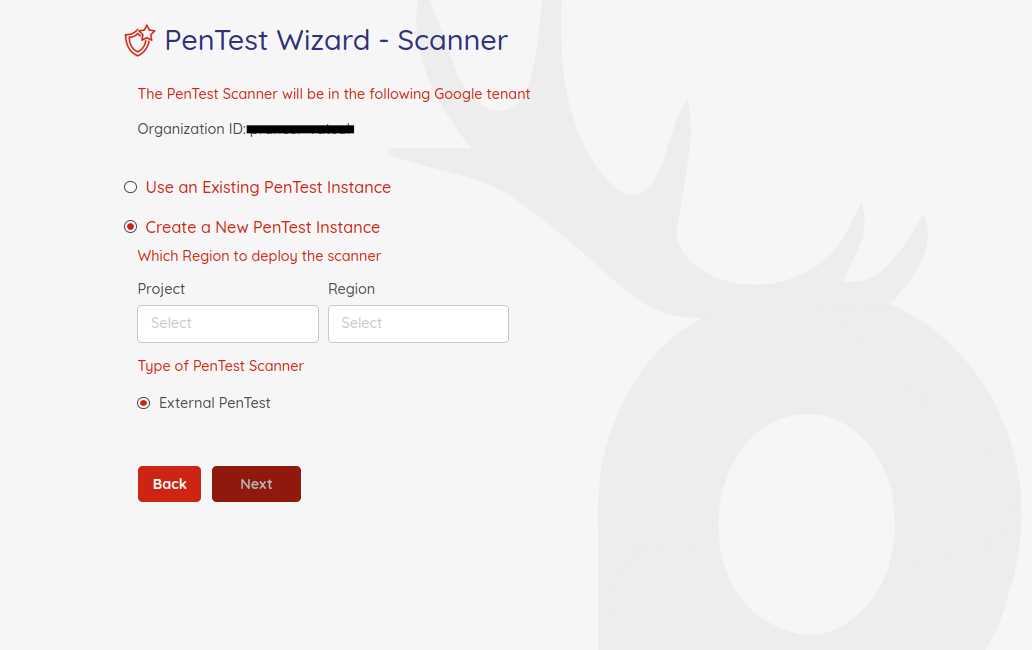
NOTE: It is require to have the
defaultnetwork exist in the VPC to create new pentest instance.
Enter the appropriate information on this page and hit "Next" button.
Step 4 - Target Selection
in this step, you will specify which target you want to run the pentest against. You can enter the URL endpoint manually. The server servicing the endpoint could be hosted on GCP or outside the GCP as a publicly available endpoint.
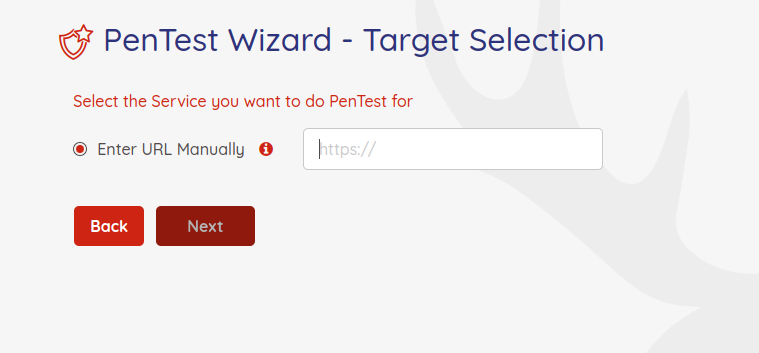
Enter the appropriate information on this page and hit "Next" button.
Step 5 - Authentication
On this page, you can configure the authentication information of your application.
Prancer PAC supports various authentication mechanisms, including:
-
Form-based
-
HTTP / NTLM
-
JSON-based
-
JWT Token
PAC requires different information to be entered on this page for each authentication type. All the secrets needed for the authentication are stored on the customer's tenant. PAC is not keeping any secret related to your application. as Part of the authentication configuration.
PAC uses a Secret Manager in the customer's GCP Project to retrieve secrets when doing pentesting. You need to select the project in which the secrets are stored.
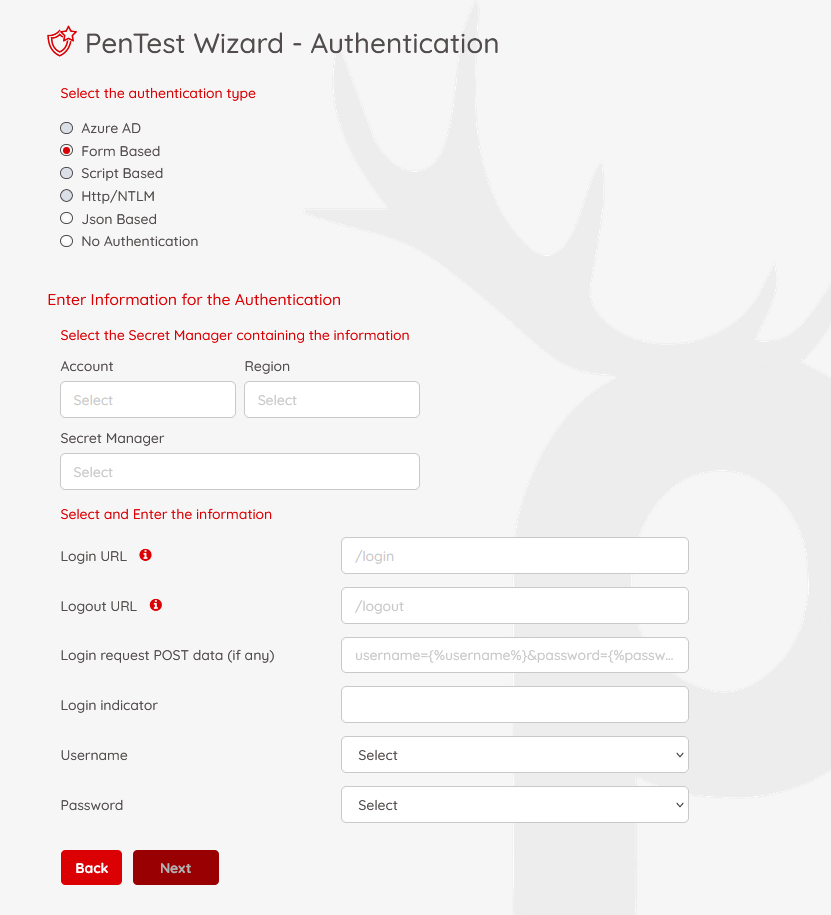
Form-based Authentication
Form-based authentication is a method most web applications use to authenticate their users. To configure PAC to use Form-based authentication, you should enter the following information:
Login URL: The URL of the login page in your web application. For example, "/login"
Logout URL: The URL of the logout page in your web application. For example, "/logout"
Login Request Post Data: The format of the post data you are using when submitting the login form. For example, identity={%username%}&password={%password%} This means the variables developer used to send the post data back to the server are identity and password At the time of pentesting, we are replacing {%username%} and {%password%} with the values we are retrieving from GCP Secret Manager
Login Indicator: When the user is logged in, what element on the page shows the user has logged in? For example, in all of your login pages, you have a logout link, which could indicate that a user is logged in.
Username: select the secret key from the secret manager key list, which holds the username
Password: select the secret key from the secret manager key list, which holds the password
When you have entered all the authentication information, click on "Next" button to go to the next page.
Step 6 - PAC file
In the last step of the pentesting wizard, PAC generates a manifest file based on the YAML format showing all the details you have entered in previous steps with more details. You can change the items here if you need. For example, you can change the name of the Kubernet cluster on the GCP to comply with your company's naming convention.

Note: To understand more about the available options in PAC file, check this page. Review all the items and if everything is fine, click on "Submit" to submit a new pentesting job to Prancer.
What happens next?
Prancer PAC engine starts to communicate with your GCP project, create the Kubernets cluster based on the configurations details in the PAC file, complete the pentesting scan, and show the results on Pentest Findings page.