PAC Configuration Wizard for AWS Cloud
Introduction
Prancer's Cloud Security Posture Management (CSPM) engine provides automated scanning and analysis of your AWS environment to identify misconfigurations, vulnerabilities, and compliance issues. It generates detailed reports to help security teams take swift action and strengthen cloud security.
This guide walks you through using your existing AWS account to run a penetration testing job. PAC (Pentest as Code) generates a YAML-based manifest with full pentest job configuration, including application info, scanner setup, target selection, and authentication settings. The Prancer PAC engine then uses this manifest to launch scanners, perform the test, and present the findings on the Pentest Findings page.
Start by selecting "Pentest Wizard" from the sidebar menu.
Step 1 – Connect to Your AWS Account
Choose "AWS Cloud" as the target environment.
You can either:
- Use an existing AWS connection by selecting it from the list, or
- Create a new connection by clicking "New connection" and filling out the required fields.
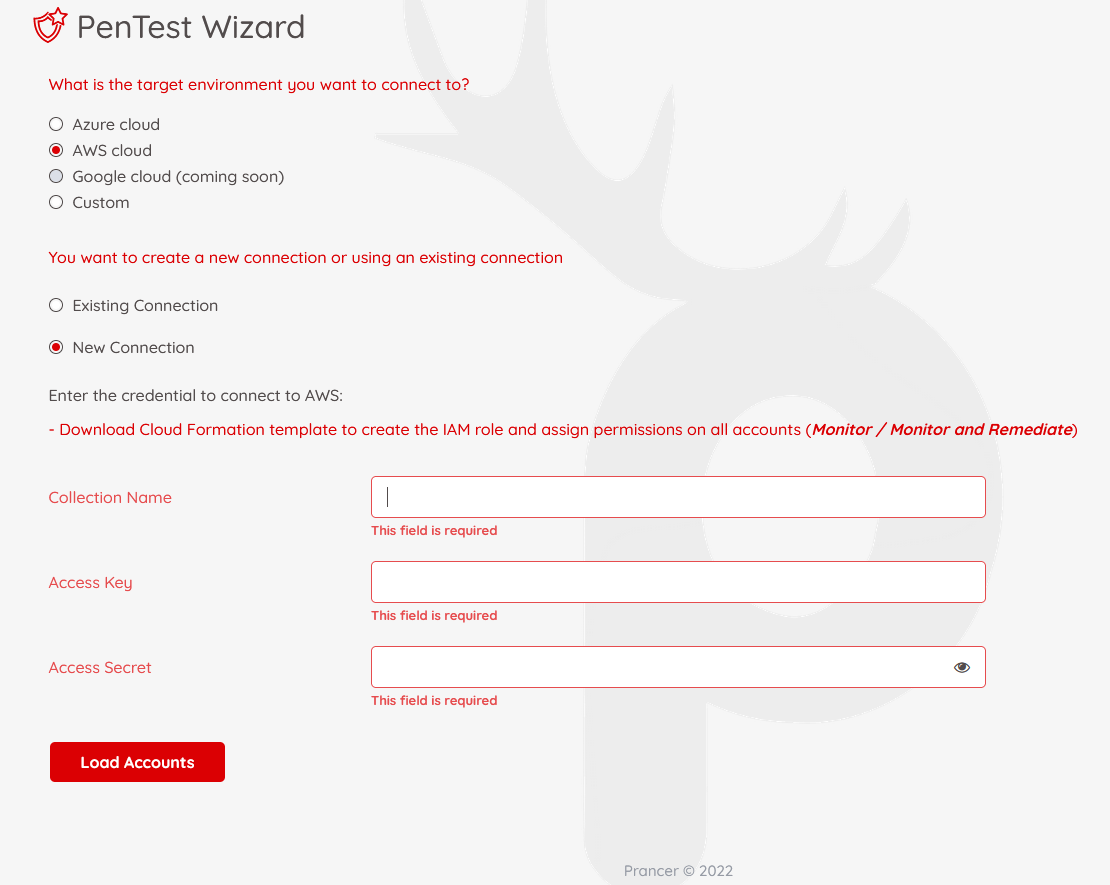
Prancer connects using IAM users. Learn more about IAM users on AWS.
Required Fields: - Collection Name: A label to group related pentesting jobs. - Access Key: IAM user’s access key ID. - Access Secret: IAM user’s secret access key.
Ensure your IAM user has: - Read access to resources like VPCs, subnets, and secret managers. - Permission to launch Fargate ECS tasks (for scanners). - Optional permissions for resource auto-discovery.
Click "Load Accounts" to list accessible accounts.
Select the accounts to include in your collection, then click Next.
Step 2 – Application Information
Fill in basic application details:
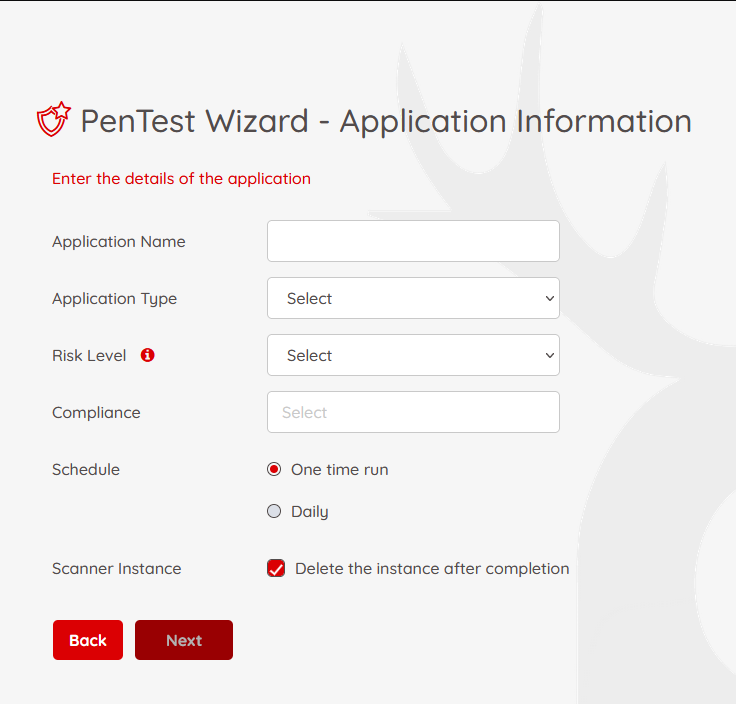
- Application Name: Identifier for your application.
- Application Type: Web, Open API, or SOAP.
- Risk Level:
- Safe – non-invasive rules.
- Attack – active testing (e.g., injecting test data).
- Standard – a combination of Safe + Attack.
- Compliance: Select applicable standards (e.g., PCI, HIPAA).
- Schedule: One-time or recurring scans.
- Scanner Instance: Choose to delete or retain the scanner after testing.
PAC scanners run on AWS ECS. Learn more about ECS.
Step 3 – Scanner Setup
Choose to use:
- An existing scanner instance, or
- Create a new scanner in your AWS account.
Option 1: Use Existing Scanner
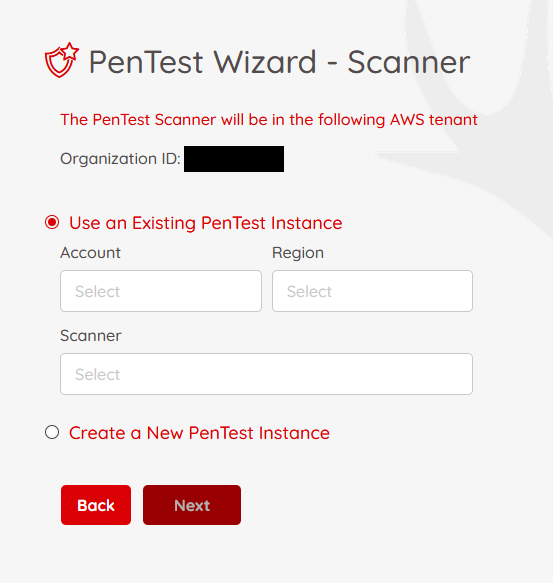
Select your AWS account, region, and ECS instance.
Ensure IAM permissions allow reading ECS resources.
Option 2: Create New Scanner
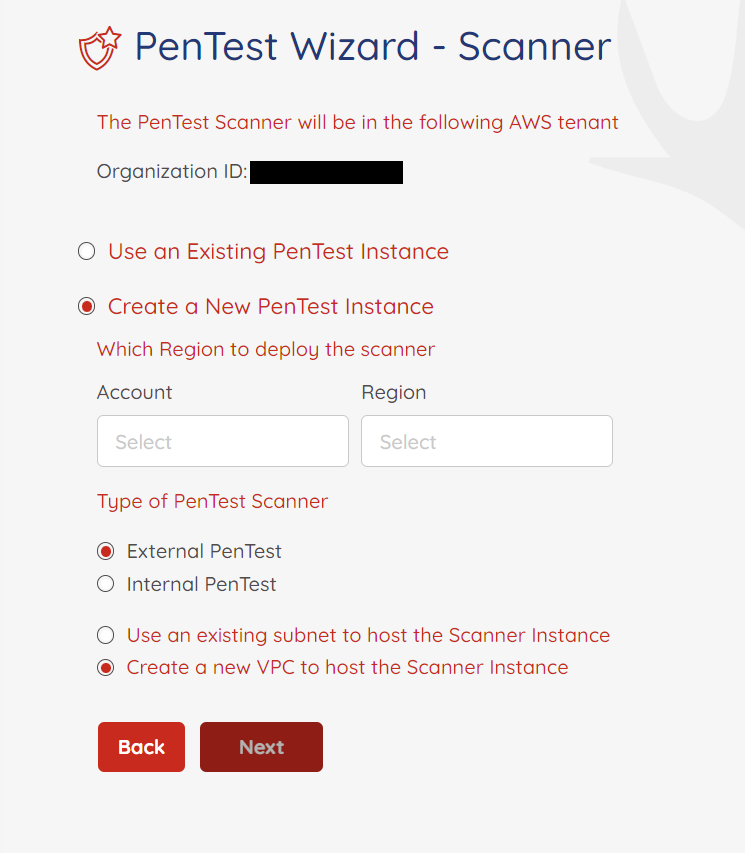
Choose: - External Pentest: Scanner gets a public IP to test internet-facing apps. - Internal Pentest: Scanner is launched inside a private subnet for internal resources.
You must also select the VPC and Subnet for provisioning.
Option 3: Use Prancer-Managed Scanner
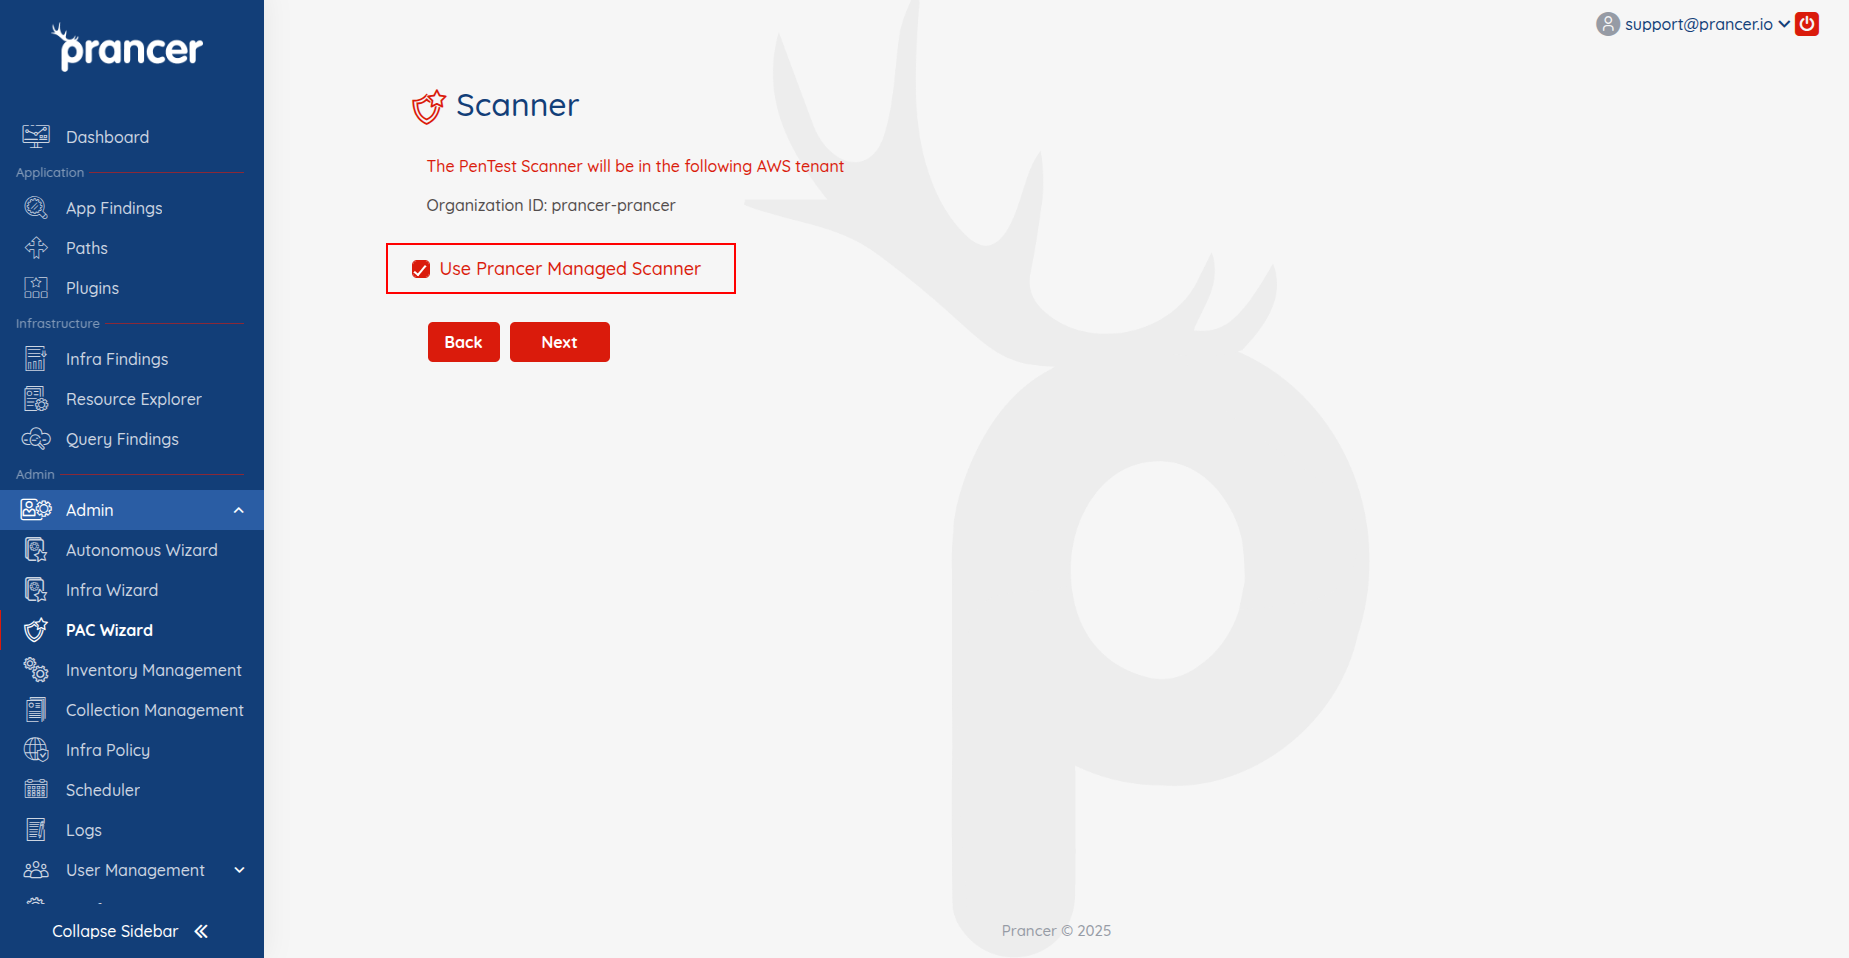
You can choose Prancer Managed Scanner, where Prancer handles creation and management of the scanner instance for you.
Step 4 – Target Selection
Define the target endpoints for the scan:
Option 1: Manual URL Entry
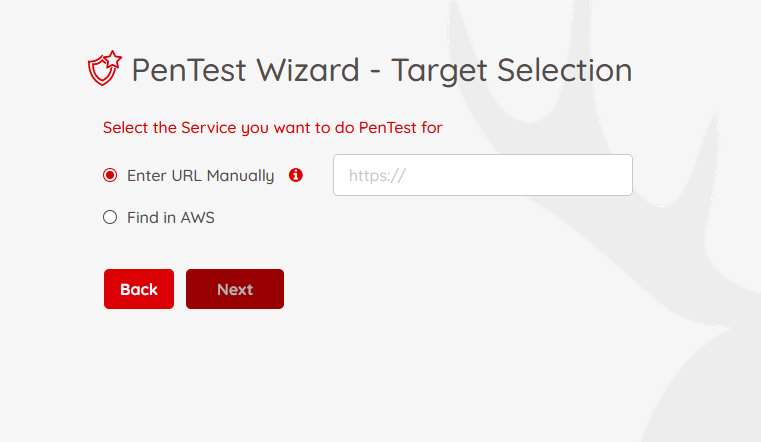
Enter URLs manually. These may be hosted on AWS (e.g., EC2, API Gateway) or externally.
Option 2: Auto-Discovery via CSPM
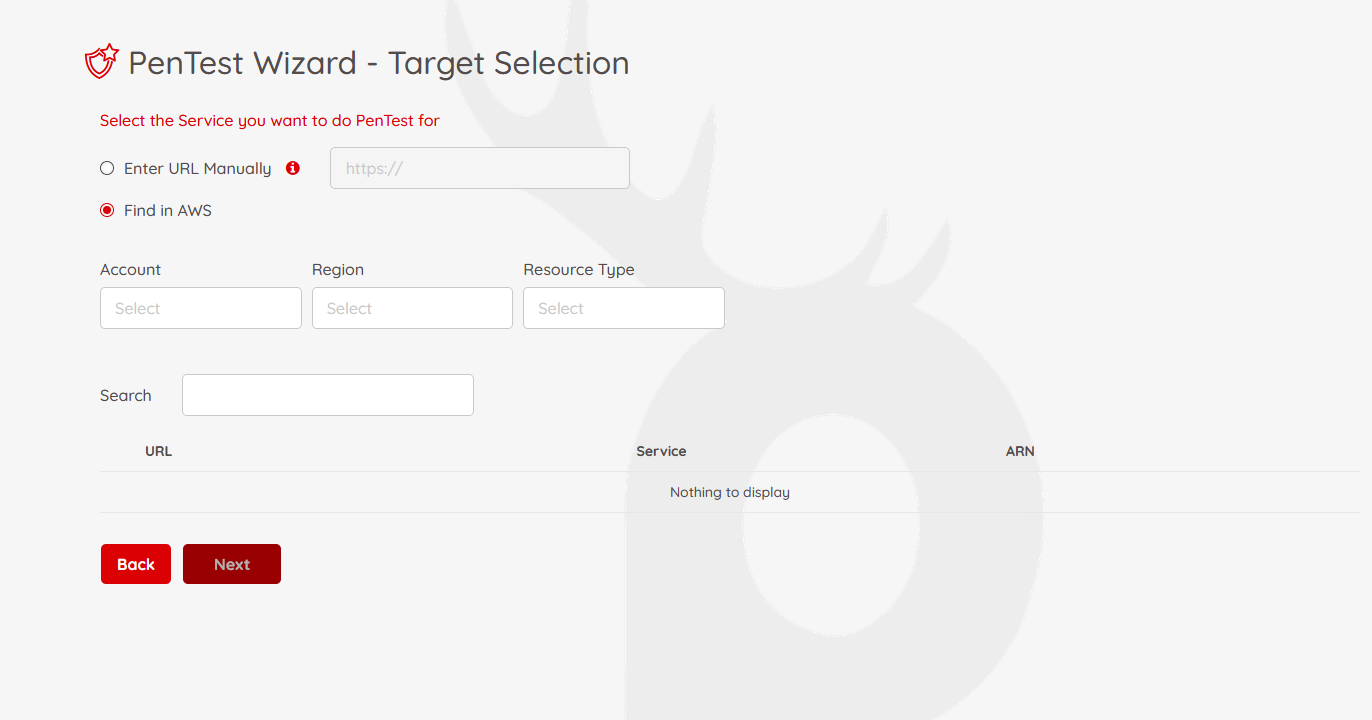
Use Prancer’s CSPM engine to auto-discover eligible endpoints in your AWS environment.
Note: IAM permissions must allow read access to discoverable resources.
Click Next after entering your target info.
Step 5 – Authentication Setup
Configure how the PAC engine authenticates with your application.
Supported mechanisms: - Form-based - HTTP / NTLM - JSON-based - Azure AD - JWT Token
Secrets are never stored by PAC. They are retrieved securely at runtime using your cloud’s secret manager.
AWS Secret Manager
PAC retrieves credentials from AWS Secrets Manager.
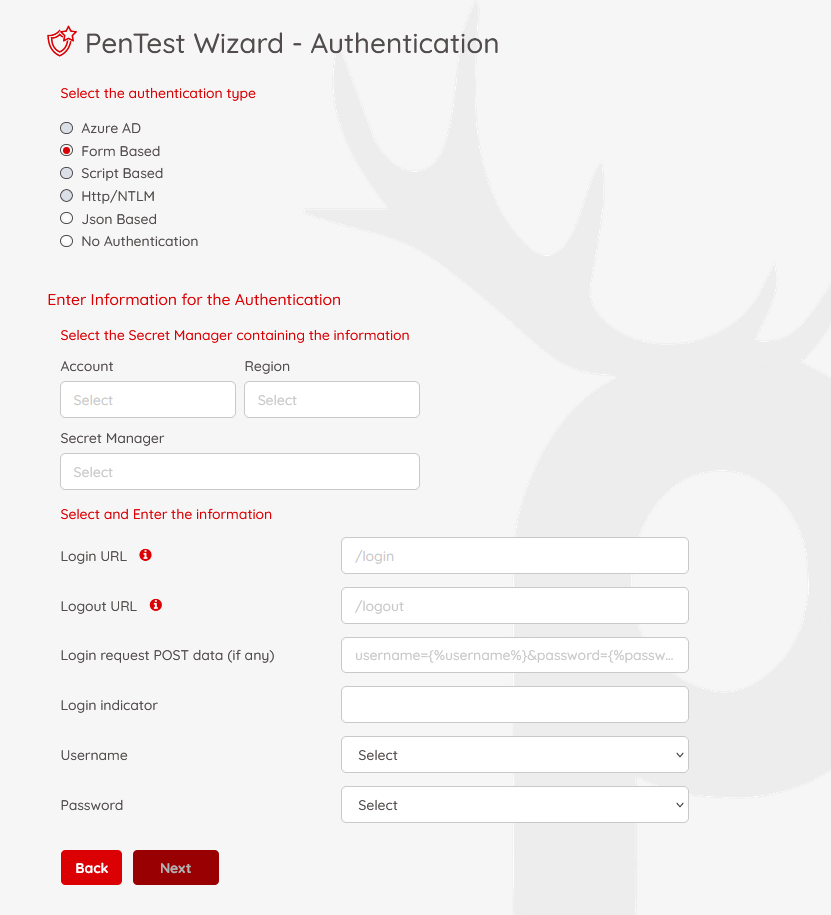
Specify: - AWS account - Region - Secret Manager name
Form-Based Authentication
Required fields:
- Login URL (e.g., /login)
- Logout URL (e.g., /logout)
- Post Data Format (e.g., identity={%username%}&password={%password%})
- Login Indicator (e.g., presence of "logout" link)
- Username / Password: Select the corresponding secret keys from the vault.
Click Next once complete.
Step 6 – PAC File Review
PAC generates a YAML-based manifest showing the full configuration.
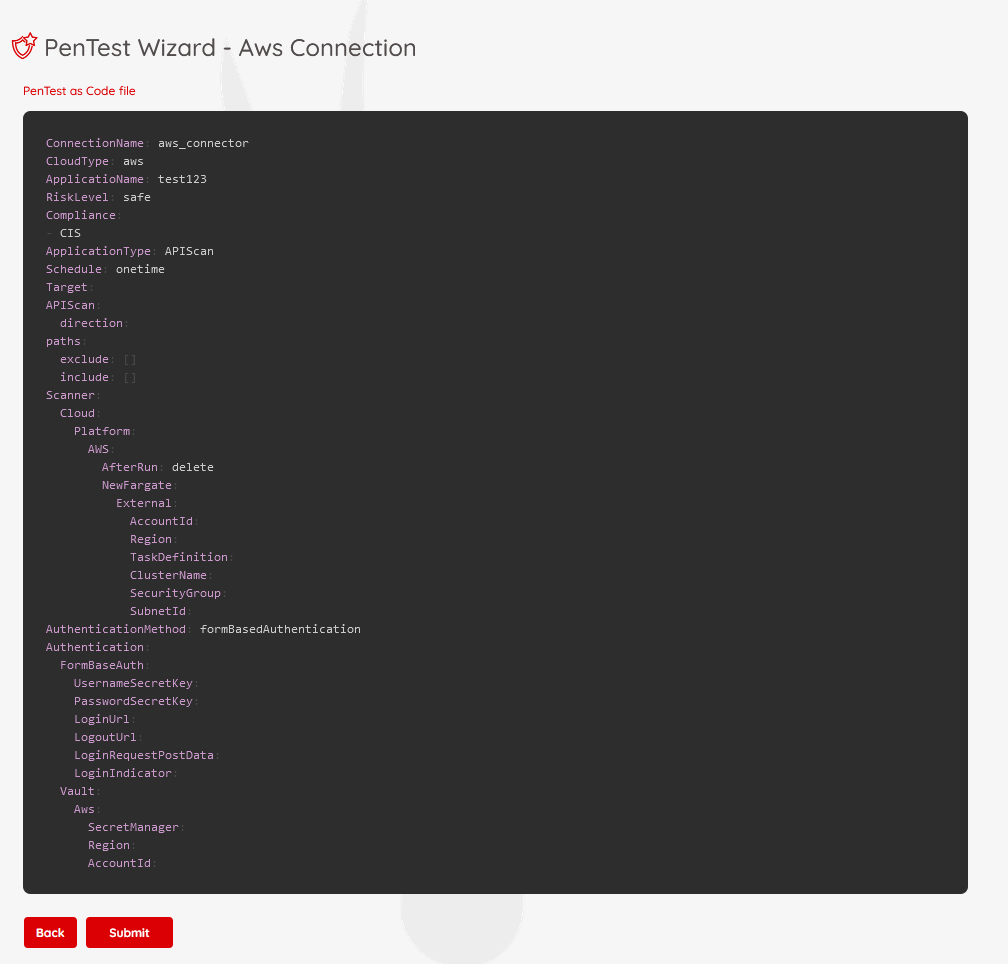
You can edit any values here, such as:
- ECS scanner name (prancer-instances by default)
- Target URLs
- Scan schedule
Click Submit to launch the pentesting job.
What Happens Next?
The PAC engine:
- Connects to your AWS account.
- Provisions or uses an ECS scanner.
- Executes the configured pentest.
- Displays the findings on the Pentest Findings page.